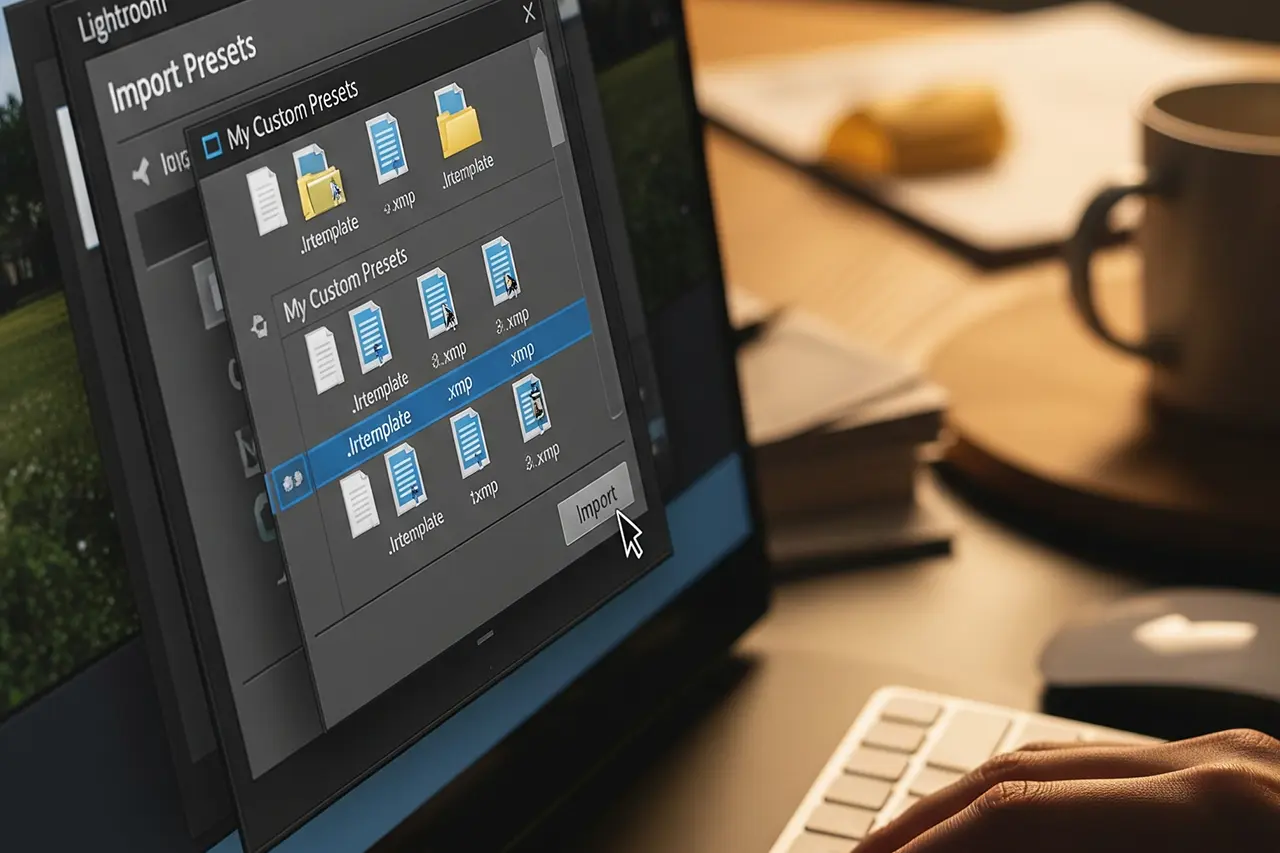

Import Lightroom Presets: Step-by-Step 2026

Import presets into Lightroom Classic, Cloud and Mobile correctly: XMP vs. LRTEMPLATE, drag & drop, ZIP packages, troubleshooting and the best sources — without chaos in the presets panel.

Import Lightroom Presets — Complete Guide 2026
Martin Kleinheinz
Author
Martin Kleinheinz
Photographer · Hannover
Updated
May 25, 2026

"How do I import Lightroom presets correctly?" — this question comes up just as often in 2026 as it did ten years ago. The good news: the process has become easier since XMP became the standard. The bad: many people still make the same mistakes — ZIP not extracted, wrong Lightroom version, presets in the wrong folder — and wonder why nothing shows up or everything looks different from the marketing.

Lightroom presets are saved Develop settings you can apply to other images with one click. They save time, deliver a consistent look and help you learn from professional edits. If you want to build your own, the guide Create your own Lightroom presets covers the full build workflow.

After hundreds of imported preset packages, I can say: the right import technique decides between success and frustration. A wrongly imported preset doesn't just work poorly — it can also clutter your existing library.

In this guide you'll learn all import methods for Lightroom Classic and Cloud, every file format, common problems and fixes — plus where to find quality presets in 2026.

00
Quick Recommendation

Import Explained in 60 Seconds

If you only need the short version before we dive into the details:

Lightroom Classic
Open the Develop module → extract the ZIPdrag & drop the `.xmp` files onto the Presets panel → choose a target folder → done. For large packs: right-click on Presets → "Import Presets…".
Lightroom (Cloud) Desktop
Edit → Presets → only `.xmp` via drag & drop. Presets sync automatically to Mobile.
File format
XMP is the 2026 standard. `.lrtemplate` only in Classic — often converted on import. Mobile does not support LRTEMPLATE.
Classic ↔ Cloud
No auto-sync of the preset library. Export from Classic as XMP → re-import in Cloud.
01
Basics

Understanding Presets and Choosing Formats

A preset stores Develop settings: highlights, shadows, tone curve, HSL, color grading, sharpening and more. Unlike Instagram filters, every value remains editable — the preset is a starting point, not the final answer.

Five reasons to import presets

  • Time saved — instead of 10–15 minutes per image, often just 2–3 minutes of fine-tuning.
  • Consistent look — important for Instagram, client galleries and portfolios.
  • Learning effect — analyzing pro presets teaches you color grading and curves.
  • Inspiration — discover new styles without starting from scratch.
  • Batch workflow — combined with sync, edit hundreds of images faster.

XMP vs. LRTEMPLATE vs. ZIP

FormatLightroomUseNote
.xmpClassic · Cloud · MobileStandard since LR 7.3 (2018)Future-proof, all modern features
.lrtemplateClassic only (legacy)Old preset packsOften converted to XMP on import
.zipBoth (after extracting)Commercial preset packagesAlways extract, then import the XMP
Creative CloudLightroom (Cloud)Cloud syncPresets appear on every device

Lightroom preset file formats at a glance (as of 2026)

XMP also stores color grading, AI-mask definitions (adaptive presets) and Point Color — features that `.lrtemplate` doesn't know. Anyone installing Adobe Lightroom fresh in 2026 works almost exclusively with XMP.

02
Lightroom Classic

Importing Presets in Lightroom Classic

Lightroom Classic offers three proven paths — from beginner drag & drop to a manual folder for troubleshooting.

Method 1 · Drag & drop (recommended for beginners)

1
Open Lightroom Classic and switch to the Develop module (press D).
2
Place the preset files (`.xmp` or `.lrtemplate`) on the desktop or in a download folder — extract any ZIP first.
3
Drag the files onto the Presets panel (left).
4
Choose a target folder or create a new one — e.g. "Film Looks" or "Portraits Warm".
5
The presets appear immediately and are ready to use.

Method 2 · Import dialog (large packs)

For collections with 50+ files or when you want to set the target folder in advance:

1
Right-click on the Presets panel → "Import Presets…"
2
Select multiple `.xmp` files (Cmd/Ctrl + click).
3
Choose the target folder → Import. For large packs Lightroom shows a progress bar.

Method 3 · Manual folder (experts & troubleshooting)

Since the XMP transition, presets live in the Camera Raw Settings folder — the same place Photoshop (Camera Raw) uses:

  • macOS: `~/Library/Application Support/Adobe/CameraRaw/Settings/`
  • Windows: `%APPDATA%\Adobe\CameraRaw\Settings\`
1
Fully quit Lightroom (important for new files to be detected).
2
Create a subfolder inside the Settings folder and copy the `.xmp` files in.
3
Restart Lightroom — the folder structure appears in the Presets panel.
03
Lightroom Cloud

Presets in Lightroom (Cloud) & Mobile

Lightroom (Cloud) automatically syncs imported presets through Adobe Creative Cloud — to iPad, iPhone and Android. The workflow differs slightly from Classic.

Desktop · drag & drop

1
Open Lightroom (the Cloud app) — not Classic.
2
Go to Edit → Presets or the Presets panel on the right.
3
Import only `.xmp` files via drag & drop.
4
Create a new group via the "+" next to "Yours".
5
Presets are available on every signed-in device.

Smartphone & tablet

Presets imported in the desktop Cloud version appear automatically in the mobile app. Alternatively, import directly in the app:

  • Open a photo → Presets → "…""Import Presets".
  • iOS Files app: save the XMP into Files, import from there.
  • Cloud download: load packs from Dropbox or Google Drive into the app.

Synchronization Classic ↔ Cloud

Important: presets are not synced automatically from Classic to Cloud — only images and selected settings, not the entire preset library.

Classic → Cloud
In Classic: right-click on a preset/group → Export → save as `.xmp` → import into Lightroom (Cloud).
Cloud → Classic
Export XMPs from Cloud (where offered) or import presets again from source files into Classic.
Best practice
Pick a master version (usually Classic for pros) and distribute presets from there.
04
Comparison

Import Methods at a Glance

MethodDifficultySpeedBest for
Drag & dropVery easyFastSingle presets, beginners
Import dialogEasyMediumLarge packs, clear folders
Manual folderAdvancedSlowTroubleshooting, backup
Creative Cloud syncEasyAutomaticCloud + mobile workflow

Comparison of preset import methods

Beginners: drag & drop in Classic or Cloud Desktop — hard to mess up, instant visible result.

Pros: the import dialog for large packs, regular export as backup, a test folder for new packs before they enter the main library.

05
Troubleshooting

Solving Common Import Problems

Problem 1 · Presets don't appear

Check format
Only `.xmp` in Cloud/Mobile. `.lrtemplate` is Classic-only.
ZIP extracted?
Importing directly from a ZIP does not work.
Restart Lightroom
Fully quit and re-open.
Clear cache
Preferences → Performance → clear cache (Classic).
Single-file test
Import a known-good preset — if it works, your package files may be corrupt.

Problem 2 · Preset looks different from the marketing

Camera profile
Under Basic → Profile, switch to "Adobe Color" or the profile recommended by the vendor.
RAW vs. JPEG
Many presets are optimized for RAW.
Lightroom version
New presets require an up-to-date Classic version.
White balance
Correct individually before applying the preset.

Problem 3 & 4 · Duplicates and slow performance

Duplicates: right-click → Delete. Reorganize folders via drag & drop in the panel. Radical option: export everything, clean up and re-import systematically.

Performance: more than 200–300 presets can noticeably slow Classic down. Clean out regularly, keep only what you use and archive the test folder.

06
Sources

Where to Find Good Presets

SourcePriceQualityRecommendation
Adobe Community / DiscoverFreeMixedQuick start
YouTube & photography blogsFreeVariableLearning & experimenting
VSCO / RNI FilmsPaidVery highAuthentic film looks
Established photographersPaidHighCinematic & editorial
Build your ownTimePerfect for youThe best long-term choice

Preset sources at a glance (as of 2026)

Free sources

  • Adobe Discover — presets searchable directly inside the Cloud app.
  • YouTube tutorials — many photographers offer free packs to download.
  • Photography blogs — regular free-preset campaigns (always check the example images).

Premium — when the investment pays off

High-quality film emulations and wedding looks from established vendors often cost €20–80 per pack. Worth it if you really use the style and learn from the presets — not if you stash them unopened with 200 others.

Check quality: natural skin tones in example images, versatility across lighting conditions, updates for new Lightroom versions, honest reviews on YouTube or in forums.

07
Organization

Order, Favorites and Backup

Sensible folder structure

  • By genre: Portrait · Landscape · Street · Event · B&W
  • By style: Film · Cinematic · Natural · Moody · Bright
  • By usage: Daily · Special · Testing · Archive
  • Hybrid: `Portrait/Film` · `Landscape/Moody`

Favorites & backup

Create a "Go-To" folder with your 10–15 most-used presets. Name favorites with stars: `★ Natural Portrait`. For large projects, set up temporary folders (`Client XY Summer 2026`).

Monthly
Export every preset group (right-click → Export Group).
Cloud backup
Store the ZIP in Dropbox, iCloud or Google Drive.
Documentation
List with pack name, source, purchase date and license.
Test
Re-import the backup once on a test installation — an untested backup doesn't count.
08
Pro Tips

Best Practices for Everyday Use

Lower the strength
Many presets look more natural at 70–80 % intensity (if your version supports it) or by manually dialing back individual sliders.
Basics first
Set exposure and white balance before the preset.
Import partially
On apply, select which categories carry over (color only, curve only).
Use stacks
Base preset + color preset + look curve combined, instead of one monster preset.
Import presets
Apply sharpening, lens correction and basic noise reduction automatically on import.
Your own signature
Analyze imported presets, adjust them, save as your own version — that's how your style emerges.
Editor's Choice
Adobe Photography Plan (Lightroom Classic + Photoshop)
Bewertung
4.7
/ 5,0
★★★★
Basierend auf 0 verifizierten Bewertungen
Adobe

Adobe Photography Plan (Lightroom Classic + Photoshop)

Lightroom Classic, Cloud and Mobile in one package

The **Creative Cloud Photography Plan** includes Lightroom Classic, Lightroom (Cloud), Photoshop and 20 GB of cloud storage. Imported presets sync via the cloud to iPad and smartphone too.

Was überzeugt
  • +Sync presets between Classic, Cloud and Mobile
  • +XMP standard across all variants
  • +Photoshop (Camera Raw) uses the same preset folder
  • +Largest preset and tutorial ecosystem
Was Du wissen solltest
  • No one-time purchase
  • Classic presets are not synced to CC automatically
  • 20 GB cloud often tight for pure cloud workflows
Editor's Statement

For preset imports: Classic + Cloud + Mobile

Verfügbar bei
09
FAQ

Frequent Questions About Preset Imports

Which file format do I need for Lightroom presets in 2026?
XMP is the standard for Lightroom Classic, Cloud and Mobile. Old LRTEMPLATE files only work in Classic and are usually converted to XMP on import. For Mobile and Cloud you must use XMP.
Why aren't my imported presets appearing?
The most common causes: ZIP not extracted, wrong format (LRTEMPLATE in Cloud), Lightroom not restarted, presets imported into a collapsed or hidden folder, or corrupt files from an incomplete download. Test with a single known XMP file.
Can I import ZIP files directly into Lightroom?
No. Fully extract the archive, check whether a README is included, and then import the individual `.xmp` or `.lrtemplate` files via drag & drop or the import dialog.
Do presets sync between Classic and Cloud?
Not automatically in both directions. Images can be synced, but the preset library in Classic stays local. Export from Classic as XMP and import into Lightroom (Cloud). Cloud presets then appear on every signed-in device.
Where do presets live on Mac and Windows?
Since the XMP transition they live in the CameraRaw/Settings folder: macOS `~/Library/Application Support/Adobe/CameraRaw/Settings/`, Windows `%APPDATA%\Adobe\CameraRaw\Settings\`. Photoshop (Camera Raw) uses the same folder.
Are bought preset packs worth the money?
As learning material and time-savers often yes — as a permanent solution rarely. Buy a few packs from reputable vendors with real example images, adapt the presets to your style and in the medium term develop your own presets. A huge bought collection you never clean up tends to slow you down.
This article contains affiliate links to Adobe. If you purchase through these links, I receive a small commission — at no additional cost to you. Thank you for your support!
Newsletter

Stay in the loop.

Camera and photography news, honest gear tests and new articles — in your inbox. Infrequent but relevant. No spam, unsubscribe anytime.

Keep reading

From the journal.

Fotograf, Martin Fernando Mera Kleinheinz · Franz-Bork-Straße 21, 30163 Hannover · 0179 4085397