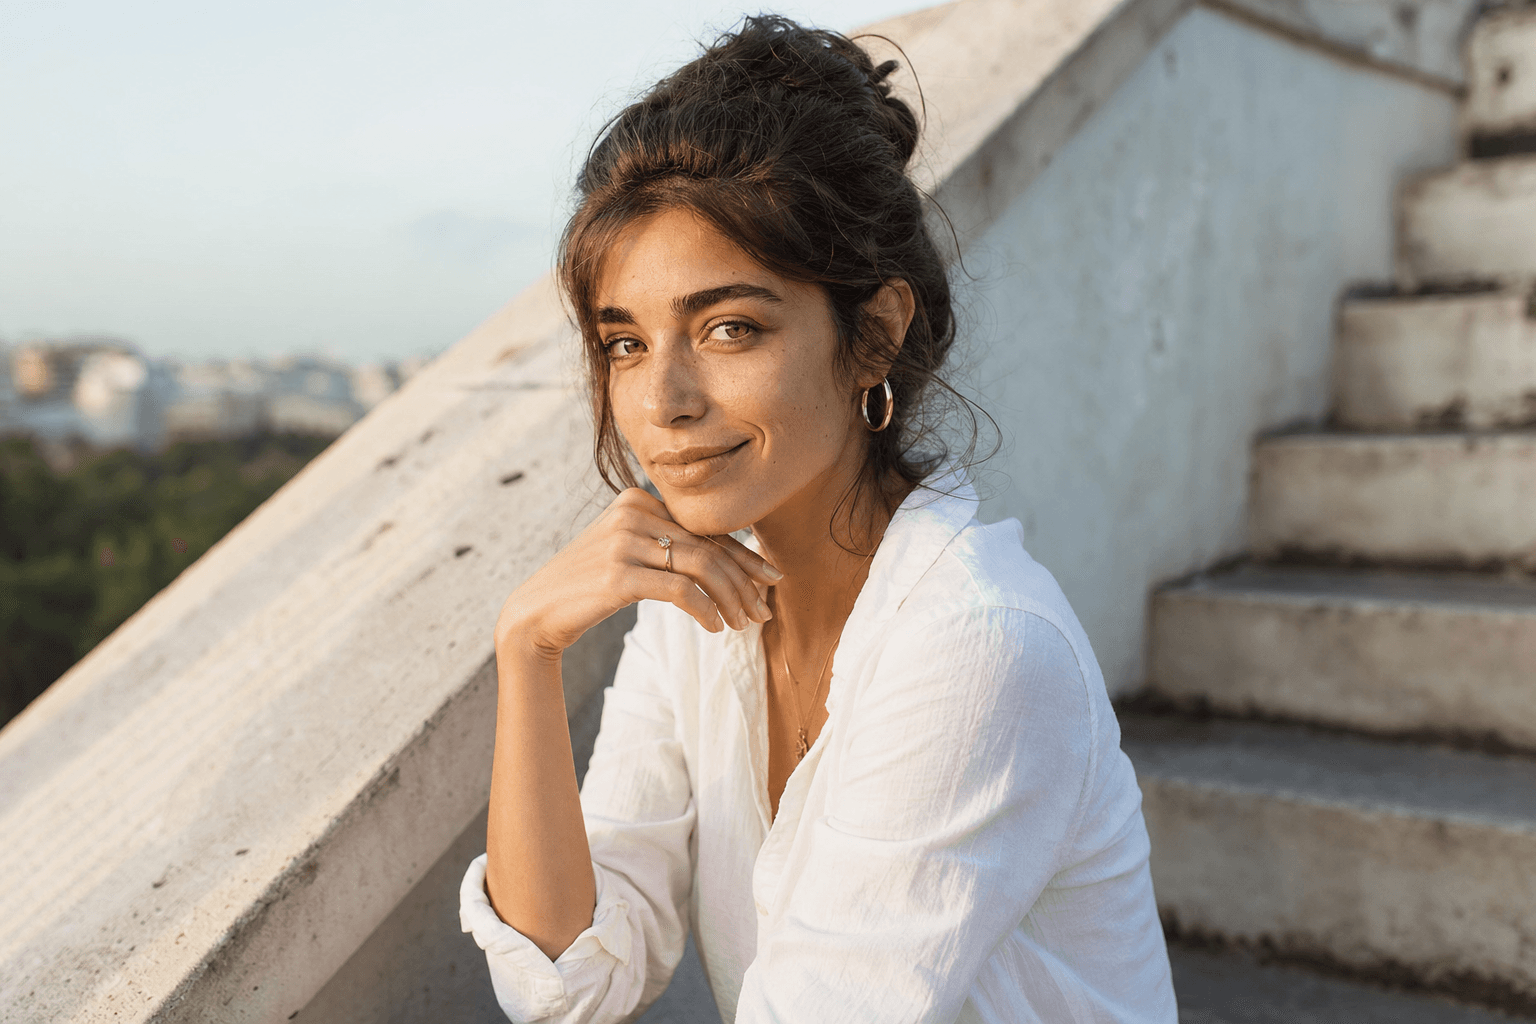

Studio Portrait Lighting: Patterns, Modifiers, and Setups

A system instead of five recipes: light patterns (loop as default), softbox vs. umbrella, physics (distance, ratio, feathering), then one-, two-, and three-light setups — realistic for a home studio and flash, not just continuous light.

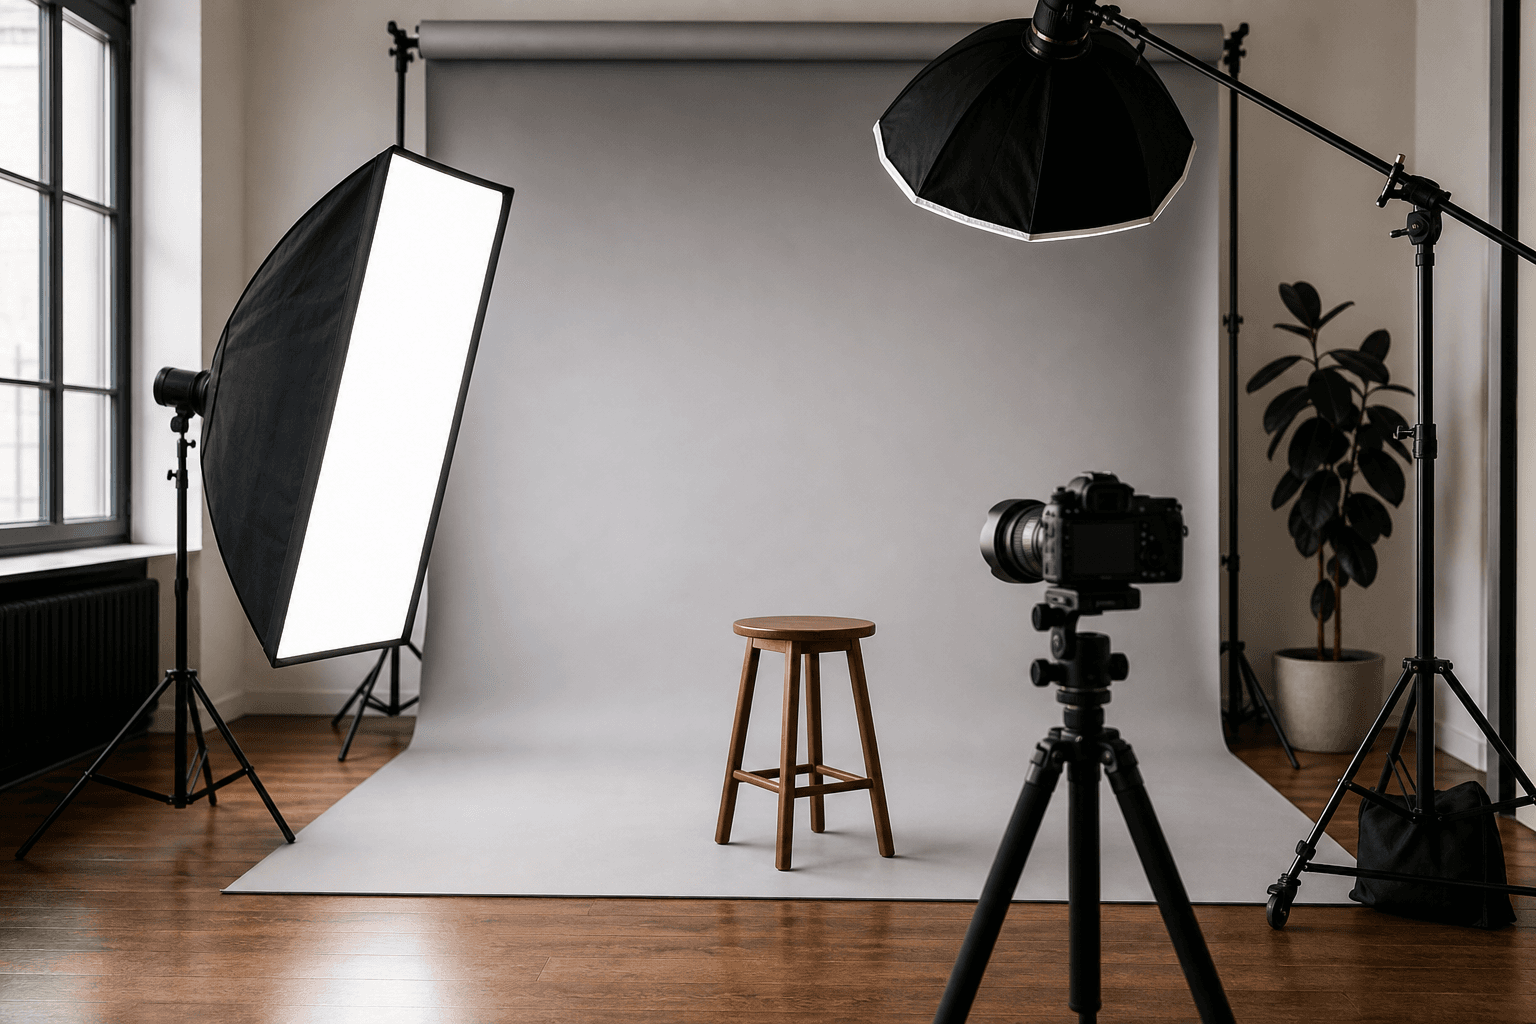
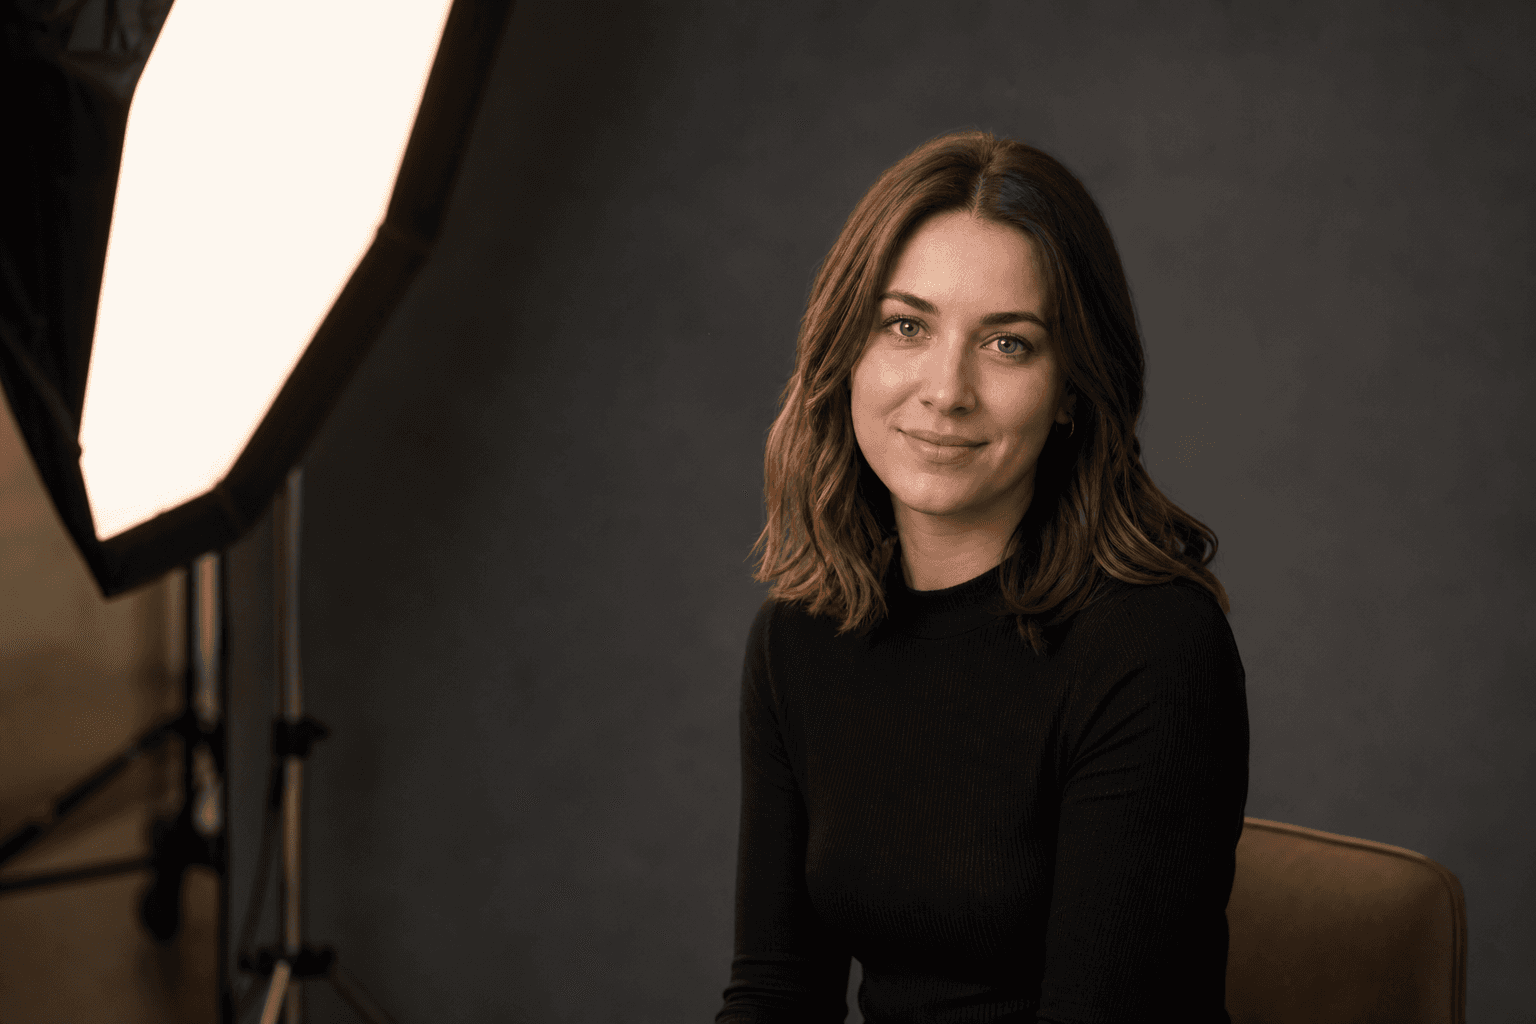
Studio portrait lighting — softbox key light and model in a home studio
Martin Kleinheinz
Author
Martin Kleinheinz
Photographer · Content Creator · Hannover
Updated
July 19, 2026

There's a softbox in the living room, the background is hanging crooked, and you're wondering: Rembrandt? Umbrella? Another flash from behind? Most guides then list five "setups" — and you copy positions without understanding why the light looks the way it does.

I work differently: a system, not a recipe catalog. First the light pattern on the face (where does the shadow fall?), then the modifier (how soft and how tight?), then physics (distance, height, ratio, feathering). Only after that comes light number two and three. And yes: flash is often more practical than "just LED" in a home studio — ambient off, subject lit, done. Fundamentals here: Flash Photography Guide.

What you'll get here: a default you can set up tonight, correct terminology (key = main light, fill = brightening — don't mix them up), a clear softbox-vs.-umbrella decision, and the path to white, gray, and black backgrounds. Pose and direction live in Portrait Posing; camera basics and general portrait advice in Portrait Photography Tips.
00
Start

Default: One-Light + Reflector

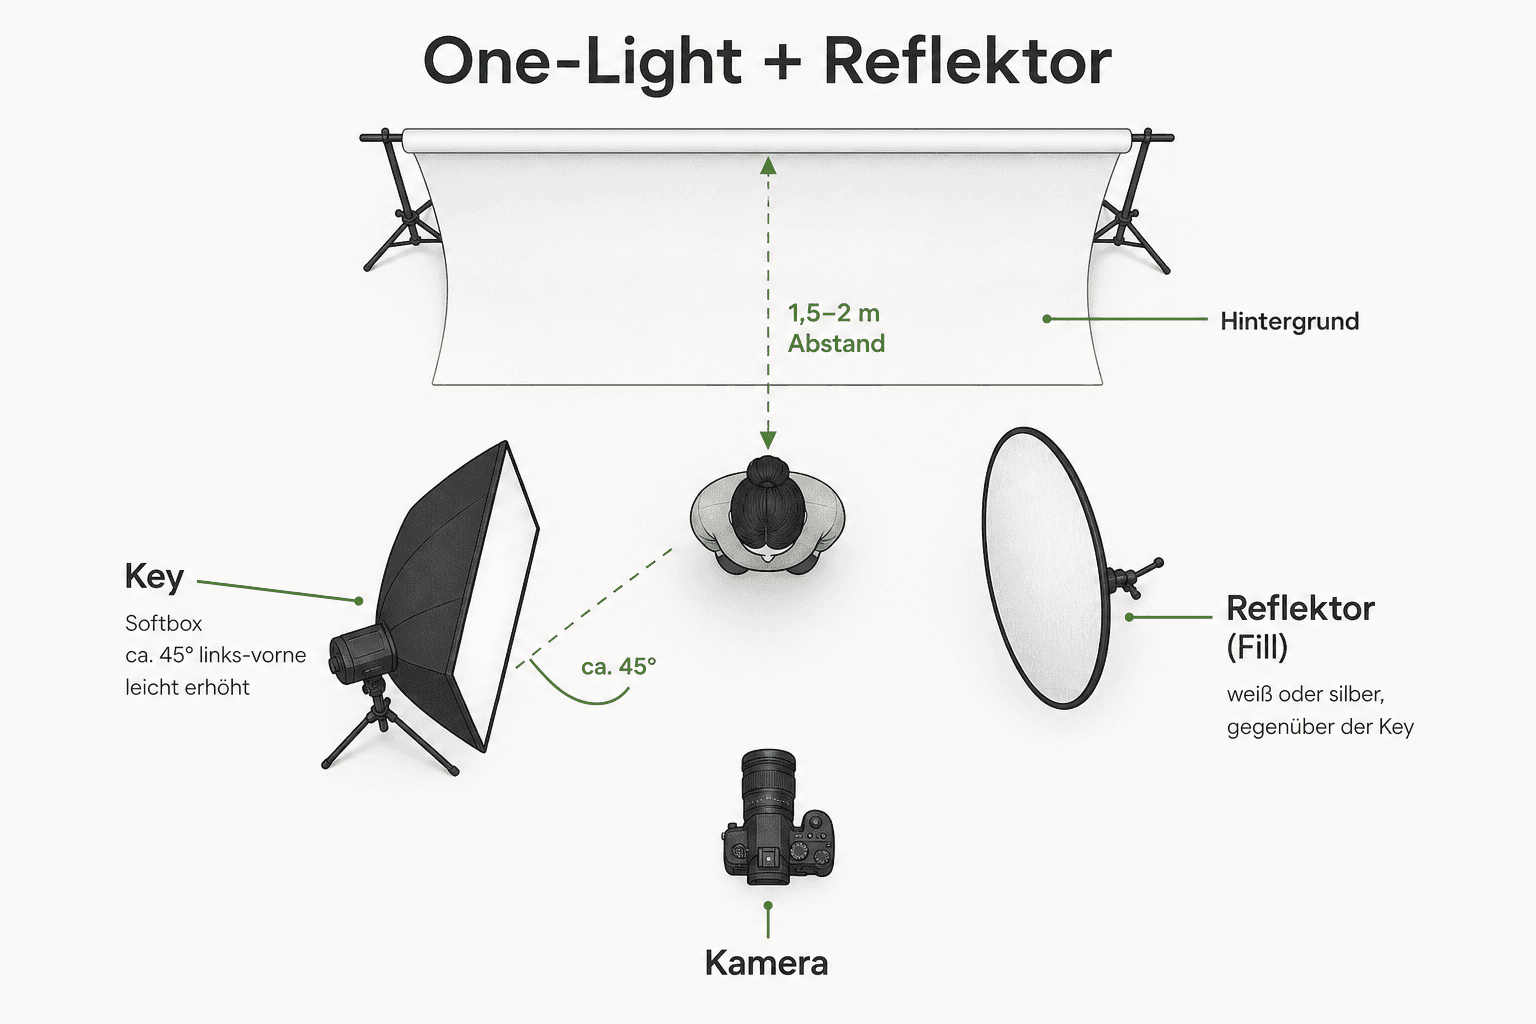
If you take away just one thing: one key light (softbox, slightly above eye level, about 30–45° off the camera axis) and, on the shadow side, a white reflector as fill. This isn't a workaround — it's the setup behind most business headshots and clean portraits.

Top-down view of a one-light setup: key softbox, model, white reflector as fill, camera
One light + reflector — key from the front-side angle, fill as a surface, no second flash needed
Key (Main Light)
Softbox or large umbrella. Positioned elevated, slightly off to the side. Draws the nose, cheekbones, and catchlight. This is the light that makes the portrait — not the fill.
Fill (Brightening)
White reflector opposite the key. Fills in the shadow under the eye and chin without adding a second hard light. Goal: shadow side still visible, but softer.
Subject-to-Background Distance
As far as the room allows (often 1.5–2.5 m / 5–8 ft). Less shadow falls on the background, and you get more control over gray/black. Details: Black Background for Photos.
Camera
Start with flash in manual or TTL, then fine-tune manually. Lower the ambient light in the room (fast shutter speed / low ISO / stopping down a bit if needed) so the flash carries the image.
Starter Kit

Modifier · Fill · Key Flash

**#1 Softbox 80×80 + grid** as the top-pick modifier. **#2 Reflector** as fill without a second flash. **#3 AD200 Pro** when your speedlight in the softbox runs short on power.

Vergleich
Godox
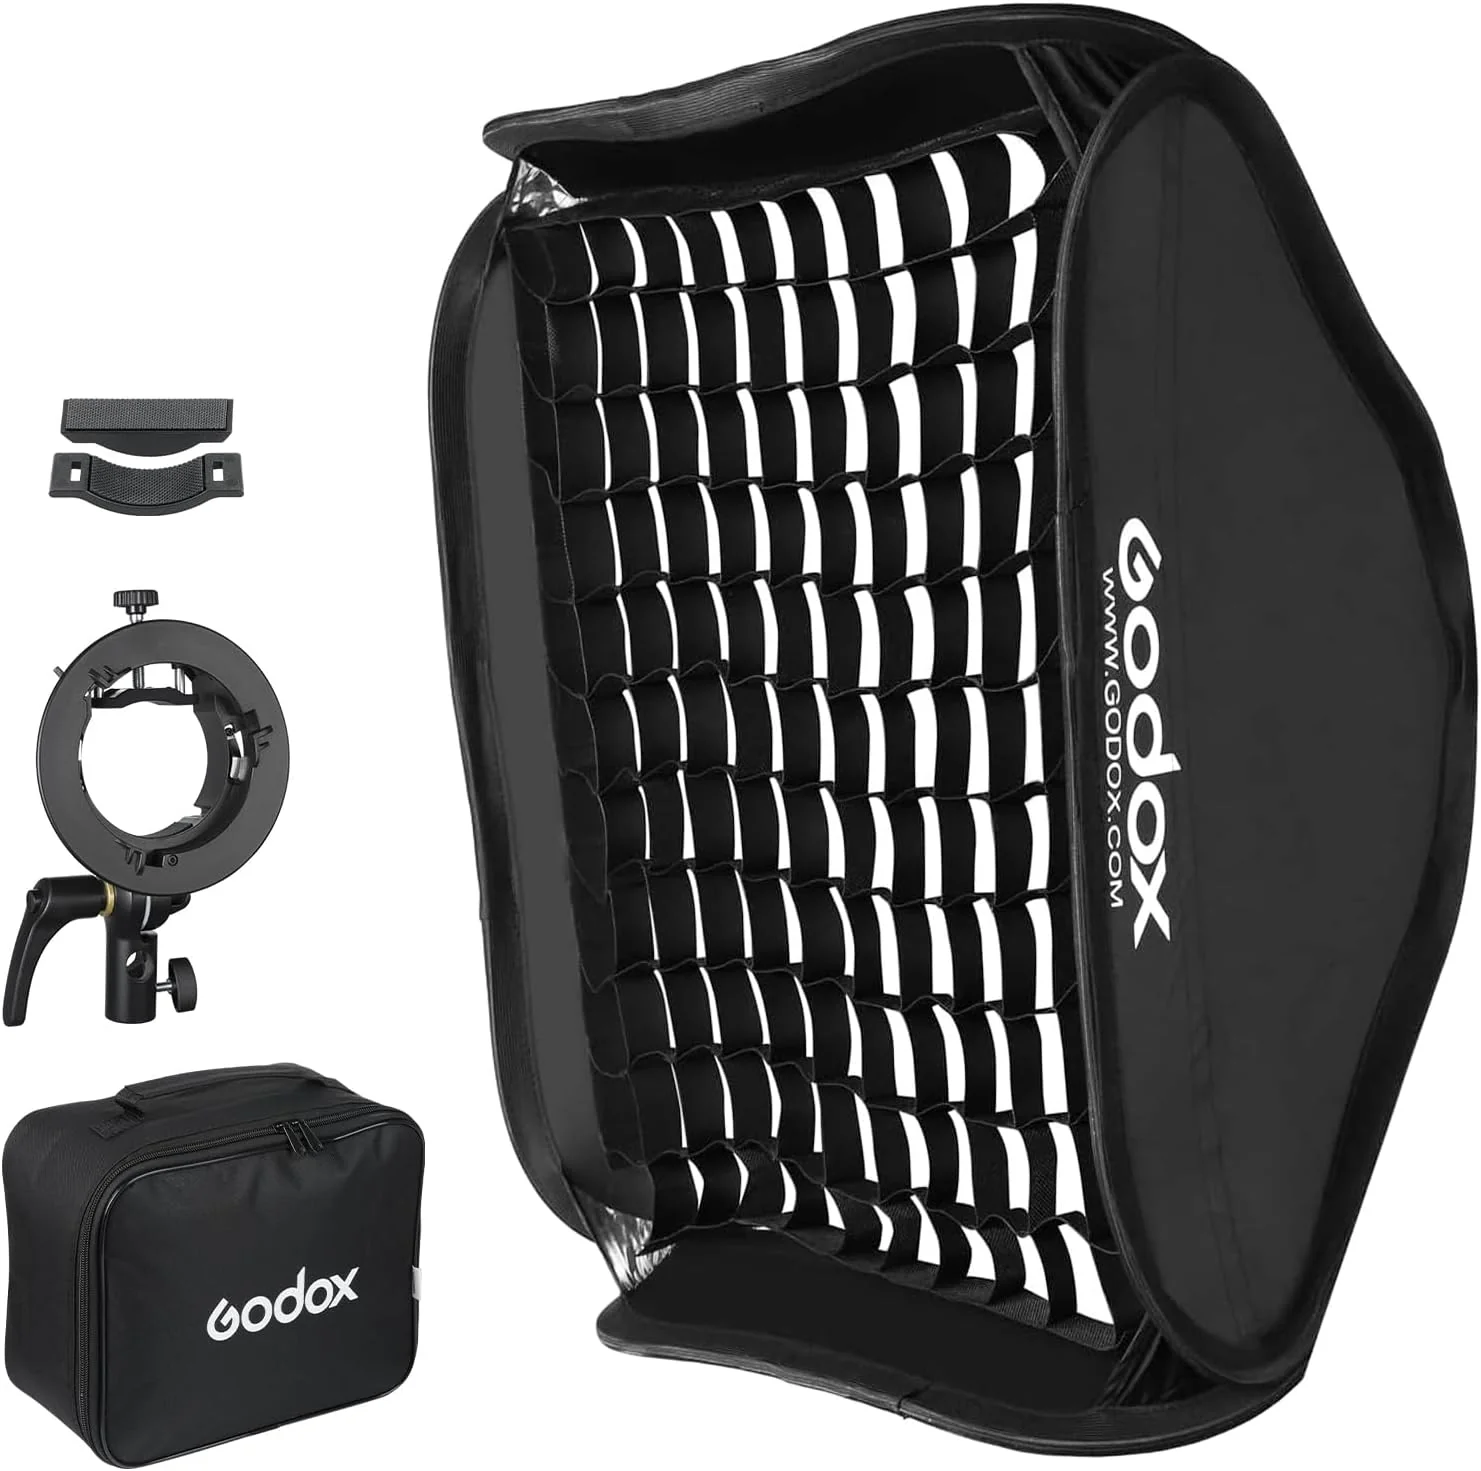
Godox Softbox 80×80 with S2 Mount & Grid
Neewer
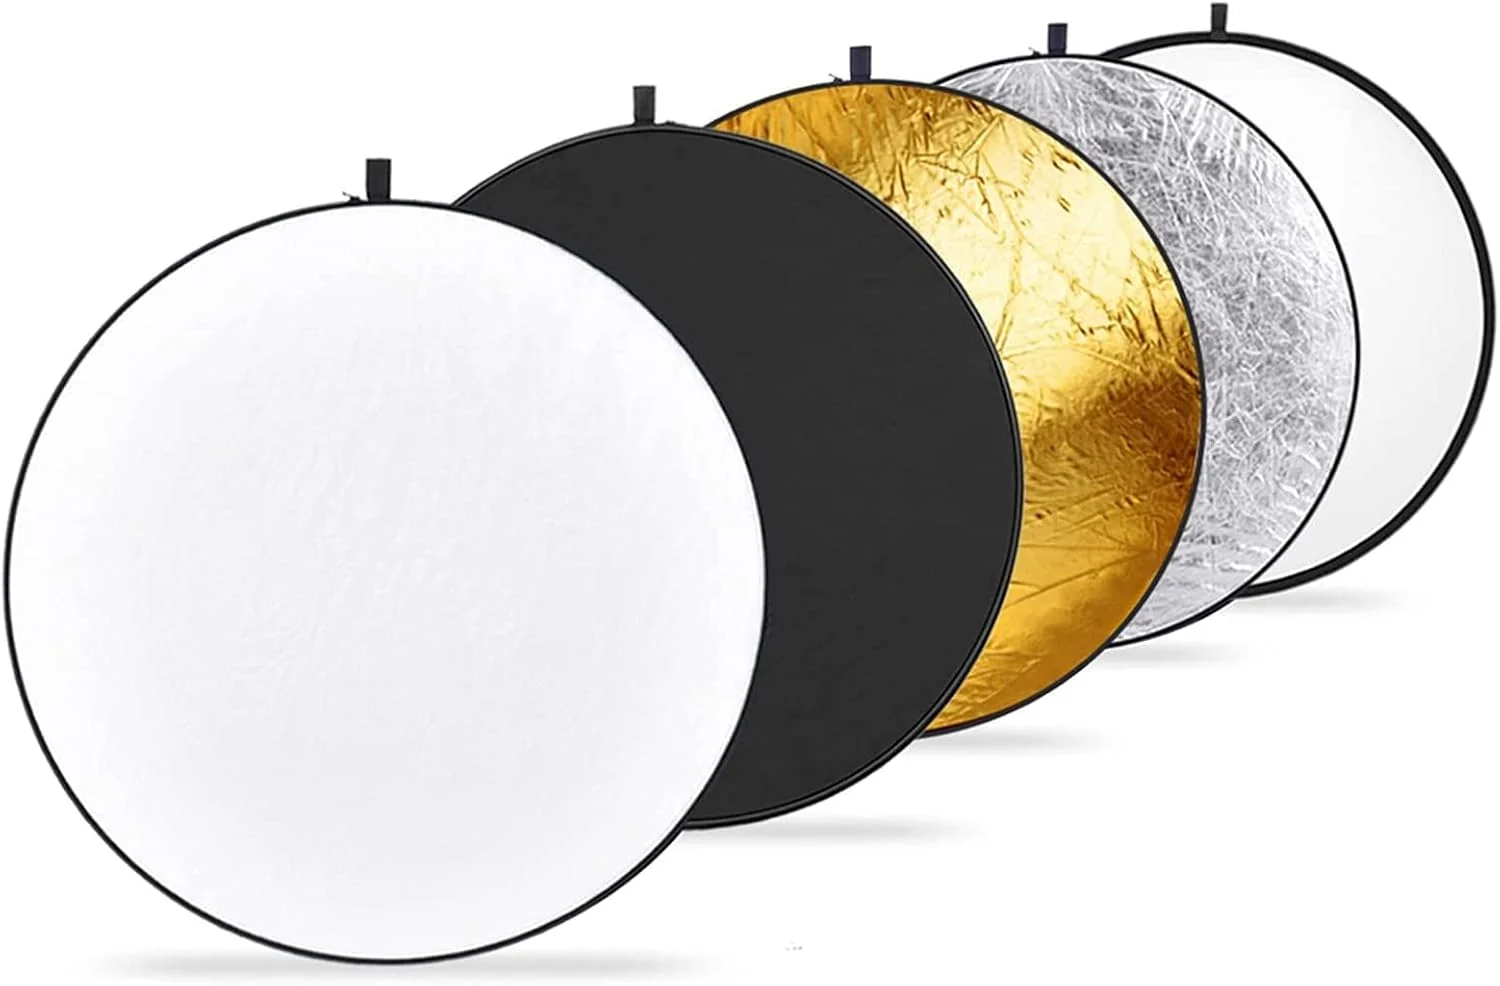
Neewer 5-in-1 Reflector 110 cm
Godox
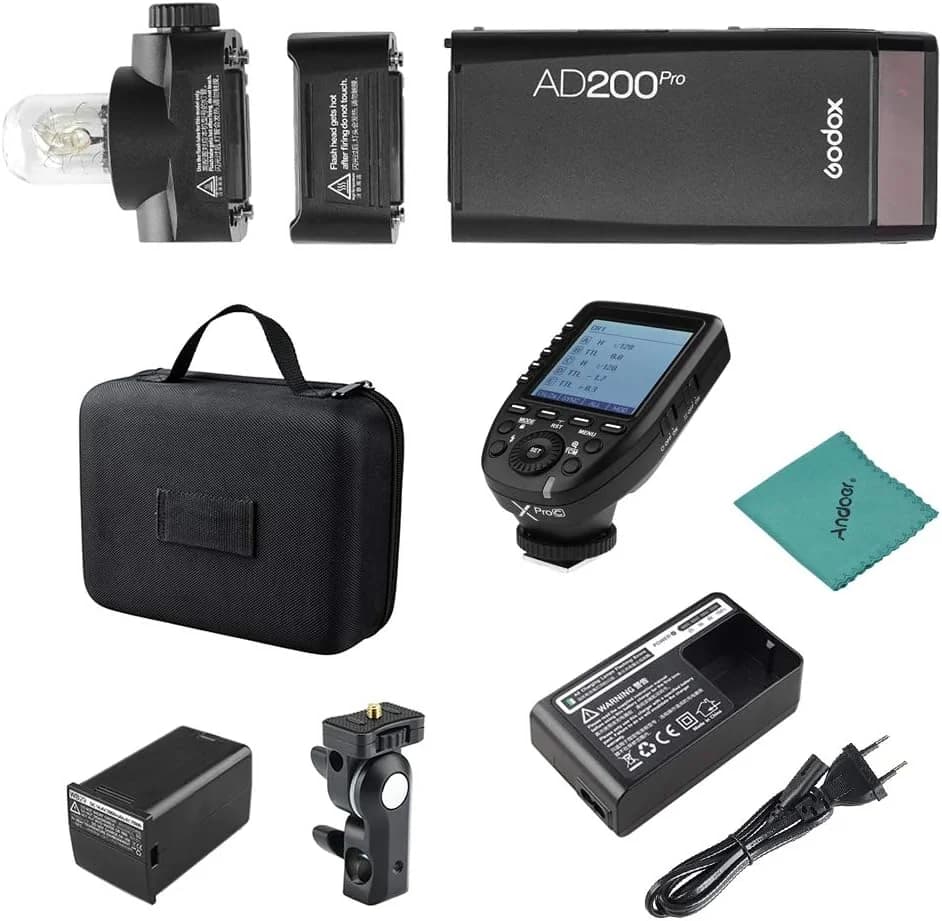
Godox AD200 Pro
Bild
Godox Softbox 80×80 with S2 Mount & Grid
Neewer 5-in-1 Reflector 110 cm
Godox AD200 Pro
EmpfehlungTop PickFillKey Flash
SensorSoftbox 80×80 cm5-in-1 folding reflectorapprox. 200 Ws
ISO-BereichS2 / speedlight + Bowens-compatibleapprox. 110 cm dia.Battery · TTL/HSS (system)
AutofokusGrid / honeycomb includedDiffuser · Silver · Gold · White · BlackBare / Fresnel (bundle dependent)
DetailKey light portrait · home studioOne-light fill · window light · outdoorKey · softbox · location
Stärken
  • +Soft key light sized for a living room
  • +Grid keeps spill light off the background
  • +S2 mount included — no extra purchase needed
  • +Works with speedlights and the AD200
  • +A second "light" without flash and without ratio chaos
  • +White side for natural portrait shadows
  • +Black side doubles as a flag
  • +Compact — also works for location and window light
  • +Enough power for a softbox plus some distance
  • +Compact for home studio and location
  • +Fast recycling for a portrait workflow
  • +Bowens/S2 ecosystem with Godox modifiers
Schwächen
  • 80 cm needs some room and a stable stand
  • Takes longer to set up than a shoot-through umbrella
  • Often too small for group lighting — portrait-focused
  • Needs support in wind (a person or a stand)
  • Gold turns warm quickly — too much for business skin tones
  • Doesn't replace a directional rim light
  • Budget for a trigger and modifier separately
  • Often underpowered for large groups/halls compared to the AD600
  • Learning curve TTL vs. manual — learning manual pays off
Geeignet fürHome studio and business headshots: a clean key light with control over spill.One-light portraits at home and on location, when you want to control fill without a second flash.Anyone taking softbox lighting seriously and ready to move from speedlight to reliable studio power.
Wo kaufen
01
Patterns

Four Light Patterns: Loop as the Default

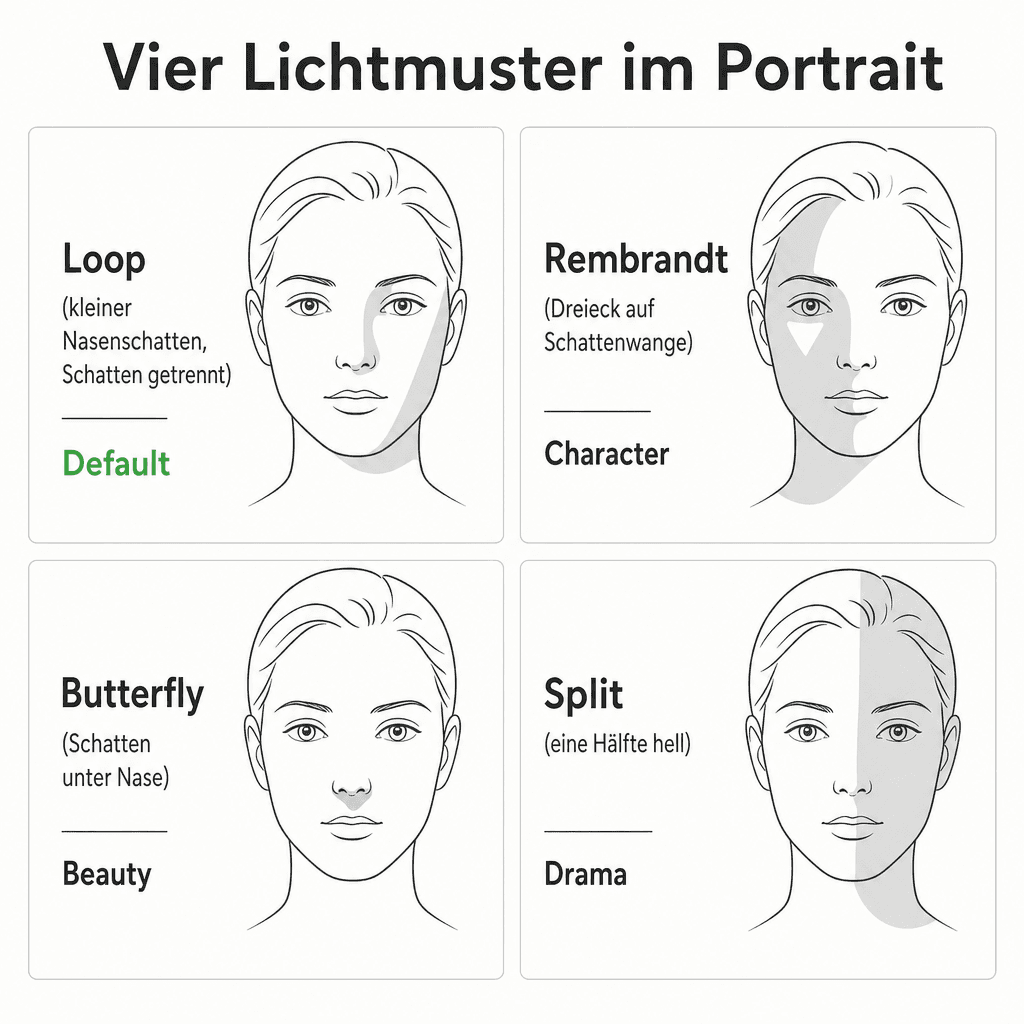
A light pattern is the shadow shape on the face — regardless of whether you're using flash or LED. You identify it by the nose shadow and by how the shadow side of the cheek looks. Learn the four classics, and you'll move the key light deliberately instead of guessing.

Face diagram of the four portrait light patterns: Rembrandt, loop, butterfly, and split
Light patterns — loop for everyday portraits, Rembrandt for character, butterfly for beauty, split for drama
PatternKey Position (Rough)TellWhen to Use
Loop (default)slightly to the side, a bit elevatedsmall nose shadow toward the corner of the mouth, cheek still openBusiness, headshots, everyday portraits
Rembrandtfurther to the side / a bit lower in angletriangle of light on the shadow cheekCharacter, editorials, striking faces
Butterfly / Paramountfrontal, above the camera, highbutterfly-shaped shadow under the noseBeauty, smooth skin look, fashion-adjacent
Split90° to the sideone half of the face lit, the other darkDrama, strong contrast, deliberate hardness

Read the pattern from the nose shadow — not from a "setup name" you remember

Why Loop Is the Default — Not Rembrandt

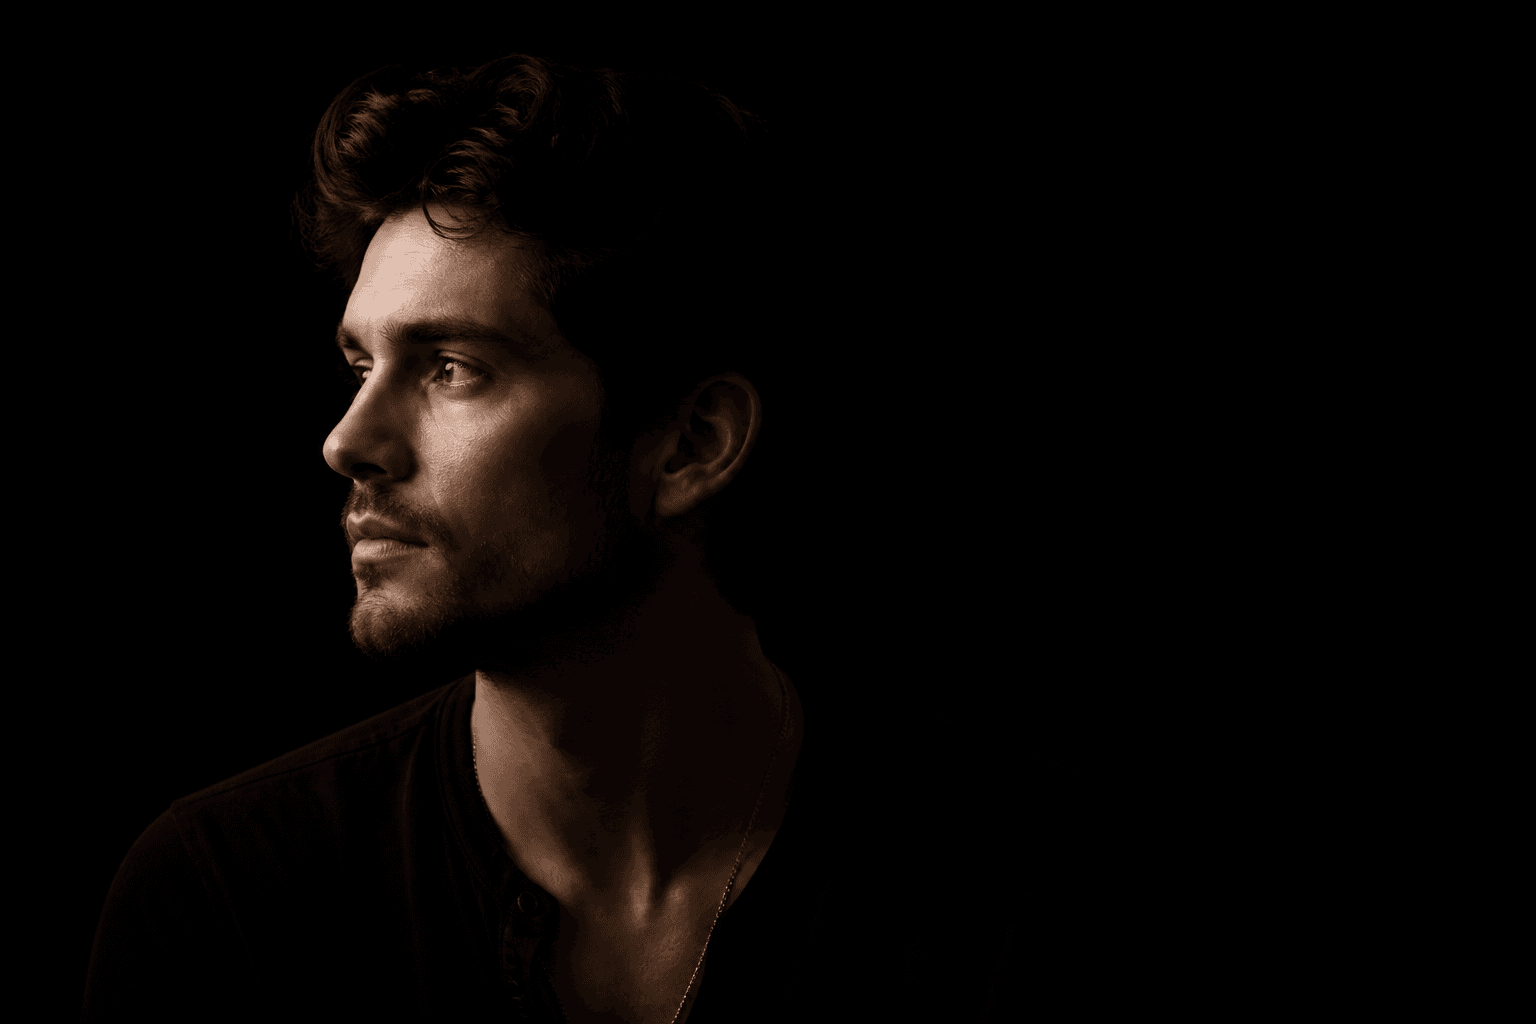
Rembrandt looks heroic in tutorials. In practice, it's too dramatic for many business clients and LinkedIn portraits: one cheek stays deep in shadow, and the triangle looks deliberately "artistic." Loop keeps dimensionality but stays open and friendly — ideal for profile pictures and clean headshots.

Reach for Rembrandt when character and edge are the goal: musicians, authors, strong editorial looks. Split only when drama is the actual goal — not as an accident because the light happened to sit too far to the side.

Don't Forget Catchlights

Without a highlight in the eyes, every pattern looks dead. Set the key high enough that the shadow under the nose looks right — but not so high that the eye sockets go dark. Butterfly often needs a light fill from below/in front (reflector), or the cheeks look hollow.

35mm & 120mm film presets — Lightroom presets by Martin Kleinheinz
Lightroom PresetsNew

Photos with film character

9 Lightroom presets inspired by Portra, Kodak, Fuji & Ilford — for street, portrait and landscape. One-time €29, no subscription.

35mm & 120mm Film Lightroom Presets · €29

View film presets9 presets · XMP · lifetime
02
Modifier

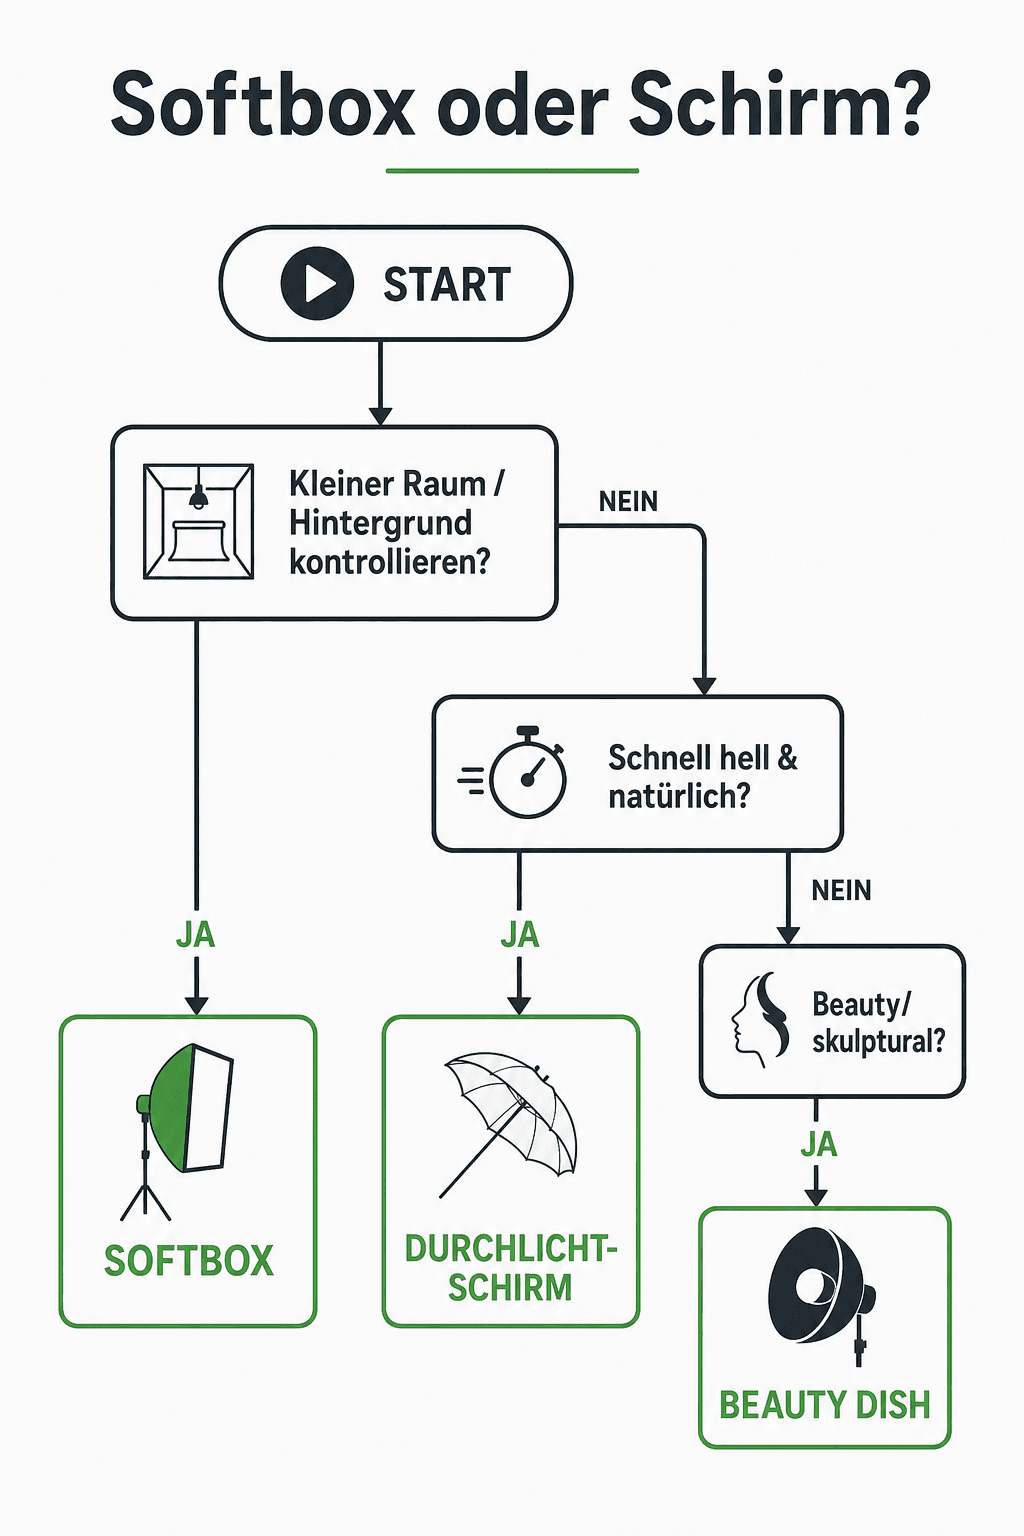
Softbox vs. Umbrella: One Clear Decision

Both soften the light compared to a bare flash. The difference comes down to control vs. spread — and that's exactly where many home studios go wrong: umbrella everywhere, softbox with a grid used with intent.

Decision diagram: softbox versus shoot-through umbrella for portrait studio light
Softbox = control & edge control · umbrella = wide spread & fast setup
CriterionSoftbox (+ Grid)Shoot-Through Umbrella
Spreadmore directional, edges controllablewide, fills the room
Backgroundeasier to keep dark/grayoften brightens the background and room too
Skin / Contrastsoft but dimensionalvery soft, goes flat faster
Setuplonger, needs spacefast, good for pace
Default forHeadshots, black background, controlbright natural look, little time

Rule of thumb: want to separate the background → softbox. Want the room to light up too → umbrella.

Choose a softbox (+ grid) when …
Business headshot, dark background, minimal spill, loop/Rembrandt with clear shape. Grid = fewer stray light bounces onto walls and ceiling.
Choose an umbrella when …
You want a bright, natural look where the room is allowed to play along, or you need to be set up in five minutes. Fill often happens through room reflection already — still keep a reflector handy.
Size matters
The larger the light source relative to the face, and the closer you are, the softer the light. An 80×80 close to the subject often beats a "big" box three meters away.
03
Physics

Distance, Height, Ratio, and Feathering

Modifier and pattern alone aren't enough. Four levers decide whether the portrait looks dimensional or mushy — and whether the background cooperates.

Distance: Softer and Stronger Up Close

Closer = a larger relative light source = softer. At the same time, intensity increases sharply (inverse square law). In practice: pull the softbox closer to the face and shoulders, and move the subject away from the background. That makes skin soft and the background darker — without changing softboxes. Background physics: Black Background for Photos.

Height: Above Eye Level, Not a "Ceiling Floodlight"

Key slightly from above: nose shadow points down, cheekbones defined, catchlight sits in the upper iris. Too high → dark eye sockets. Too flat → passport-photo light with no shape. Butterfly is deliberately high; loop/Rembrandt sit more at 30–45° to the side and only moderately elevated.

Light Ratio: Shadow Side 1–2 Stops Darker

Kept simple: meter or estimate the bright cheek (key) against the shadow cheek. For most portraits, the shadow side should be roughly one to two stops darker — noticeable contrast, skin still reads well. Flatter (under 1 stop) leans beauty, often flat for character work. Harder (3+ stops) edges toward split and forgives pose and makeup less.

Ratio (Key : Shadow)Stop Diff. Approx.EffectUse Case
≈ 1 : 10–0.5very flat, beautySmoothing skin, little drama
≈ 2 : 11natural, dimensionalBusiness, default
≈ 4 : 12clear, characterfulEditorial, Rembrandt-adjacent
≈ 8 : 1+3+hard / leaning splitDeliberately dramatic

Reflector closer = more fill = flatter. Reflector further away or black = more contrast.

Feathering: Light with the Edge

Instead of pointing the softbox straight at the tip of the nose, angle it slightly away — the subject sits in the soft edge of the light cone (feathering). Result: a gentler falloff, fewer hotspots on the forehead and nose, and often a nicer skin look. Too much feather → not enough light on the face; dial it back a bit or bump up the power.

04
More Light

Two- and Three-Light Setups: Key, Fill, Rim

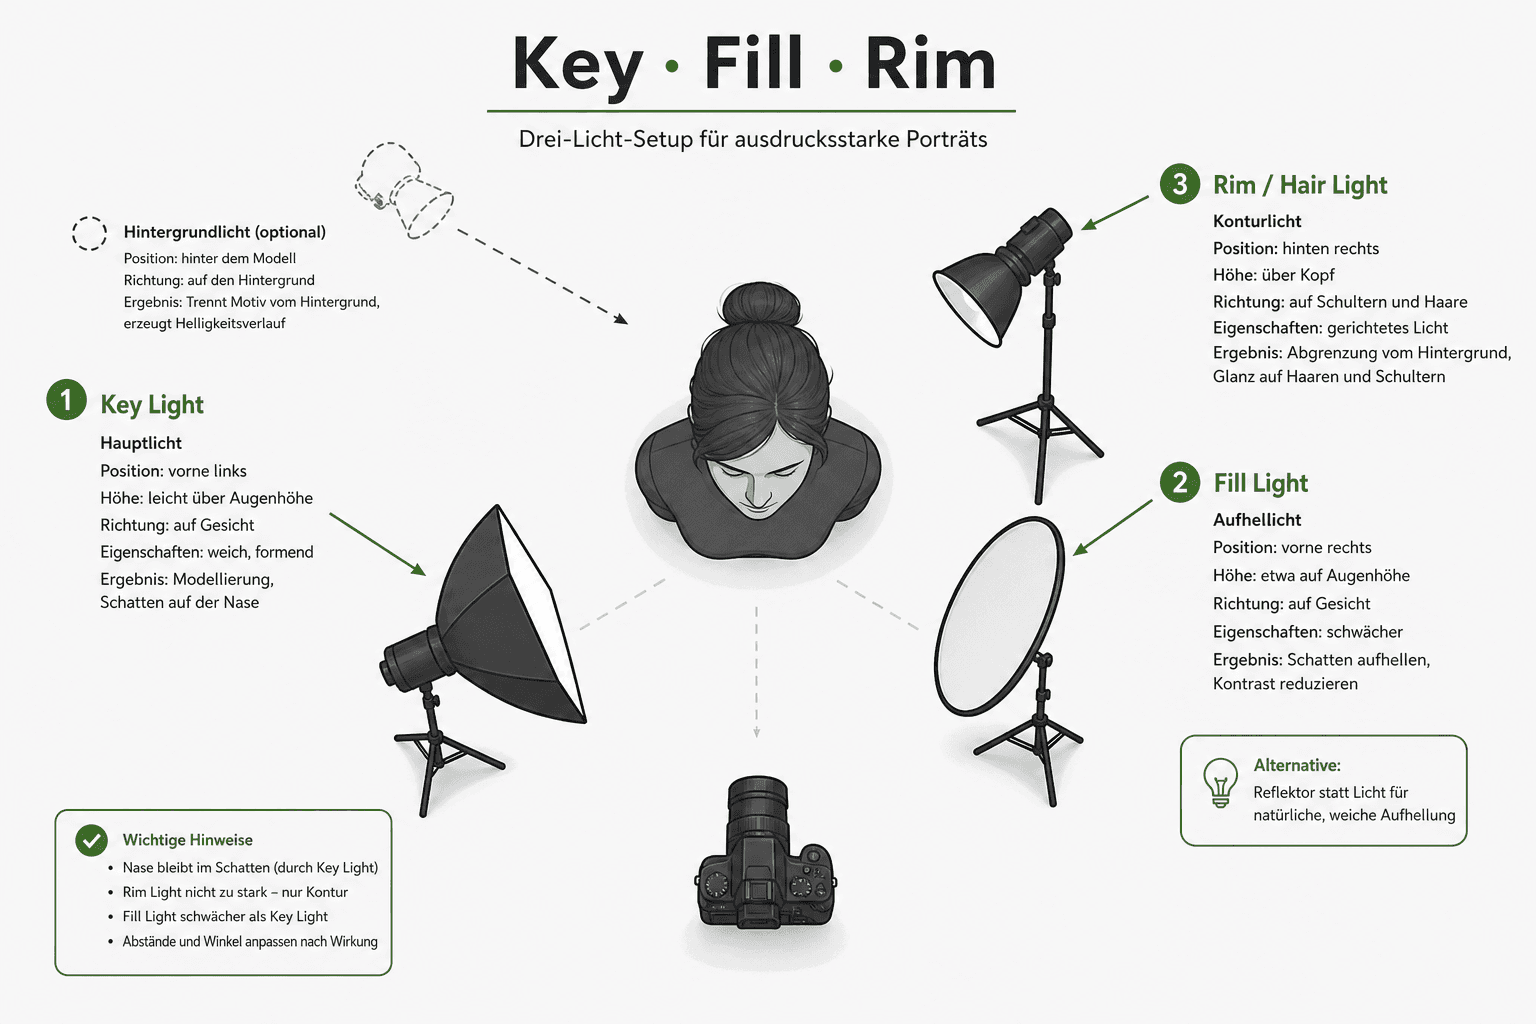
Add a second and third light source only once one-light is dialed in. Otherwise you're chasing three mistakes at once. The roles stay clear: key shapes, fill opens up shadows, rim separates from the background.

Top-down view of a three-light setup with key softbox, fill, and rim/hair light
Three-light — key from the front-side angle, fill opposite (flash or reflector), rim from the back-side angle

Two-Light: Key + Rim (or Key + Fill Flash)

Key + Reflector (Often Still the Better Choice)
Fill via a surface — softer, less specular. My default, until rim light is genuinely missing.
Key + Rim / Edge Light
Second light behind the person, opposite the key or slightly back-and-to-the-side. Separates hair and shoulders from the background. Keep it tight (reflective umbrella, bare bulb with a flag, small softbox) — don't light the nose from behind.
Key + Fill Flash
Only when a reflector isn't enough (dark clothing eats light, you want strong contrast reduction). The fill flash should be noticeably weaker than the key (often 1–2 stops under the key reading), large and soft — otherwise you get double shadows.

Three-Light: The Classic Portrait Framework

Key + fill + rim. On set, switch each one on individually and check it: first the key (pattern + exposure on the face), then the fill (ratio), then the rim (only the edge, no spill onto the face). Dial in all three at once, and you lose track of cause and effect.

Flash technique (dialing out ambient light, sync, manual vs. TTL) is covered in depth in the Flash Photography Guide. Here, this is enough: the key carries the face, everything else supports it.

Lightroom Presets9 film looks inspired by Portra, Kodak & Fuji —View pack

05
Background

Background: White, Gray, Black

The background isn't just "a piece of paper behind the model" — it's an exposure target. The same softbox can produce white, mid-gray, or black, depending on how much light hits the background and how far the subject and light are from it.

GoalLight on BackgroundSubject-to-Background DistanceModifier Note
White / high-keylight the background deliberately (own light or spill)closer is often fine if the background gets lit brightumbrella or a second background light helps
Gray / neutrallittle to moderate spillmediumsoftbox without an extreme grid
Black / low-keyas little light on background as possiblelarge (1.5–3 m / 5–10 ft)softbox + grid, tight angle

The color of the fabric or paper is only the starting point — light decides the tone in the image

White Without Blowing Out

Getting true paper-white in the file often needs a dedicated background light or enough spill. Expose for skin, pull the background up separately — otherwise the face gets blown out along with it. Good for bright corporate looks and some beauty setups.

Gray as the Workhorse

Mid-gray is forgiving. Less drama than black, less effort than high-key. Many business portraits end up here — calm, professional, without the "studio black" cliché.

Black: Distance + Tight Light

Black material alone isn't enough. Move the subject and key away from the background, use a grid, lower ambient light. Full walkthrough including molton, paper, and "flagging light off black": Black Background for Photos.

06
Gear

Budget vs. Pro — and Which Products Actually Make Sense

You don't need an Amaran rig or a boom-arm ballet to shoot good studio portraits. You need a reliable key, a modifier with control, and a fill. Continuous light works — flash is often easier in a bright living room, because you can push ambient light down. Pragmatism beats ideology.

LevelKeyModifierFillMakes Sense From
BudgetSpeedlight + triggerSoftbox 80×80 (S2)5-in-1 reflector, whitefirst headshots at home
Sweet spotAD200 classSoftbox + gridReflector, optional fill flashregular business jobs
Pro / pacestronger heads / second systemOcta + flagsdedicated fill + rimteams, frequent shoots

Spend money first on the modifier and understanding — not on light number three

Top Pick Modifier: Godox Softbox 80×80 + S2 + Grid

The lever with the best value for money. Soft key light, grid for black/gray backgrounds, S2 holder included in the kit — no extra purchase needed. Fits speedlights and the AD200. If you buy just one thing for studio portraits, make it this.

Top Pick
Godox Softbox 80×80 with S2 Mount & Grid
Bewertung
4.6
/ 5,0
★★★★
Basierend auf 0 verifizierten Bewertungen
Godox

Godox Softbox 80×80 with S2 Mount & Grid

Top Pick Modifier — Soft Key Light with Control

A square 80×80 cm softbox including a Bowens/S2 flash mount and honeycomb grid. This is the modifier that gets most of your home-studio portraits looking clean: soft key light, plus a grid that keeps spill off the background. Fits speedlights and compact studio strobes (AD200 class). Typically in the mid double-digit dollar range — more impact per dollar than a second flash without a modifier.

Was überzeugt
  • +Soft key light sized for a living room
  • +Grid keeps spill light off the background
  • +S2 mount included — no extra purchase needed
  • +Works with speedlights and the AD200
Was Du wissen solltest
  • 80 cm needs some room and a stable stand
  • Takes longer to set up than a shoot-through umbrella
  • Often too small for group lighting — portrait-focused
Editor's Statement

Master the modifier first — buy a second light later

Verfügbar bei

Fill: Neewer 5-in-1 Reflector, 110 cm

White side as the standard fill, silver when you want punch, black as a flag. Cheaper and softer than a poorly placed second flash. Essential in the one-light default.

Fill
Neewer 5-in-1 Reflector 110 cm
Bewertung
4.5
/ 5,0
★★★★
Basierend auf 0 verifizierten Bewertungen
Neewer

Neewer 5-in-1 Reflector 110 cm

Fill Without a Second Flash — White Side First

A foldable 5-in-1 reflector at roughly 110 cm: diffuser plus silver, gold, white, and black surfaces. In a one-light setup, the white side is your fill — keep the shadow side 1–2 stops darker, don't "iron it flat." Silver for more punch, black as a flag. Typically $25–40. An assistant, clamp, or second stand holds it; you stay focused on camera and pose.

Was überzeugt
  • +A second "light" without flash and without ratio chaos
  • +White side for natural portrait shadows
  • +Black side doubles as a flag
  • +Compact — also works for location and window light
Was Du wissen solltest
  • Needs support in wind (a person or a stand)
  • Gold turns warm quickly — too much for business skin tones
  • Doesn't replace a directional rim light
Editor's Statement

White = gentle fill · use silver sparingly · gold even more so

Verfügbar bei

Key Flash: Godox AD200 Pro

When the speedlight in your softbox hits its limit on power, recycle time, or consistency: the AD200 as key. Compact enough for a home studio, powerful enough for an 80×80 with some distance. Don't forget the trigger. If you only shoot portraits occasionally, stick with a speedlight + softbox for now.

Key Flash
Godox AD200 Pro
Bewertung
4.7
/ 5,0
★★★★
Basierend auf 0 verifizierten Bewertungen
Godox

Godox AD200 Pro

Key Flash — Enough Power for Softbox and Home Studio

A compact battery flash at roughly 200 Ws, TTL/HSS (depending on trigger), interchangeable heads, and enough reserve power for an 80×80 softbox even with some distance. Ideal as a key light once the speedlight in your softbox runs short on power or recycling speed. Needs a trigger (X system) and a stable stand. Typically in the upper double-digit to low triple-digit dollar range — the step up from speedlight to real studio key light.

Was überzeugt
  • +Enough power for a softbox plus some distance
  • +Compact for home studio and location
  • +Fast recycling for a portrait workflow
  • +Bowens/S2 ecosystem with Godox modifiers
Was Du wissen solltest
  • Budget for a trigger and modifier separately
  • Often underpowered for large groups/halls compared to the AD600
  • Learning curve TTL vs. manual — learning manual pays off
Editor's Statement

Power for modifiers — don't forget the trigger and softbox

Verfügbar bei
07
Practice

Mistakes That Make Portraits Flat or Harsh

Swapping Key and Fill
Two equally strong lights from the front = flat. One light has to lead. Keep the fill weaker — or use a reflector instead of a second flash.
Forcing Rembrandt Every Time
It doesn't suit every face and rarely suits corporate work. Loop first, Rembrandt on purpose.
Softbox Too Far Away
Gets hard and weak. Closer = softer and more efficient. Adjust power afterward.
Subject Glued to the Background
Shadows on the background, gray instead of black, distracting wrinkles. Create distance.
Rim Too Early / Too Strong
Shine on the nose and cheek from behind. Rim is an edge, not a second key.
Fixating on Light, Forgetting Pose
Perfect loop, stiff shoulders. Work on light and posture in parallel: Portrait Posing, basics: Portrait Photography Tips.
Ignoring Ambient Light
Warm ceiling light mixes in under the flash. Lower the ambient light — see the Flash Photography Guide.
08
Verdict

Studio Light Is a System — Not Setup Bingo

Good studio portrait lighting (or living-room lighting) doesn't come from memorizing setup number 4. It comes from controlling pattern → modifier → physics → optionally more lights → background, in that order.

Default for tomorrow: softbox as key, loop, white reflector, subject away from the background. Rembrandt when character is the goal. Softbox + grid when the background should stay calm or black; umbrella when you want bright and fast. Ratio: shadow side noticeably darker (1–2 stops), not dead.

  • Key shapes — fill opens up — rim separates
  • Loop = everyday · Rembrandt = character · Split = drama
  • Flash is often the pragmatic choice in a bright room
  • You control background tone with light and distance
09
FAQ

Common Questions About Studio Lighting

What's the difference between key and fill?
Key is the main light — it shapes the face and the nose shadow. Fill brightens the shadow side (reflector or a weaker flash) without taking over the key's shape. The key isn't a "fill light."
Which light pattern should I use as a beginner?
Loop: key slightly to the side and a bit elevated, small nose shadow toward the corner of the mouth. Move to Rembrandt only once you deliberately want more character and shadow.
Softbox or umbrella for portraits at home?
Softbox (ideally with a grid) if you want to control the background and spill light. Umbrella if you need a bright, natural look quickly and don't mind the room lighting up too.
How dark should the shadow side be?
For most portraits, about 1–2 stops darker than the key side. Flatter for beauty, harder (3+ stops) only when going for a deliberately dramatic look.
Is one light really enough?
Yes — plus a reflector as fill. Many professional headshots are one-light setups. Add a second and third light only once rim or background light is clearly missing.
Flash or continuous LED light?
Both work. In a bright living room, flash is often more practical because you can dial out ambient light. LED needs a darker room or very powerful lights. Technique: Flash Photography Guide.
How do I get the background black?
Distance between subject/light and the background, tight light (grid), lower ambient light, absorbent material. In depth: Black Background for Photos.
Do I need a rim light?
No. It helps separate hair and shoulders from a dark background. Without a clean key and ratio, rim light is just a distraction — leaving it out is fine.
What softbox size for headshots?
80×80 cm is a solid home-studio standard. Closer to the face looks softer. Larger octas produce prettier catchlights but need more space and often more power.
How does light relate to pose?
Light reveals shape — pose provides the shape. Shoulder angle and chin change how shadows fall. Light here, posture in Portrait Posing and Portrait Photography Tips.
35mm & 120mm film presets — Lightroom presets by Martin Kleinheinz

From my workflow

35mm & 120mm film presets

Portra, Kodak Gold, Velvia, HP5 & more — ready-made XMP presets for Lightroom Classic and mobile.

35mm & 120mm Film Lightroom Presets · €29

Go to preset pack
Affiliate links marked with * — Amazon product links use partner ID martinkleinheinz-21. I earn a small commission if you buy through these links; there's no extra cost to you. The recommendations are based on hands-on practice — no brand sponsored this article.
Newsletter

Stay in the loop.

Camera and photography news, honest gear tests and new articles — in your inbox. Infrequent but relevant. No spam, unsubscribe anytime.

Keep reading

From the journal.

Fotograf, Martin Fernando Mera Kleinheinz · Franz-Bork-Straße 21, 30163 Hannover · 0179 4085297