Why calibration is indispensable for photographers, which colorimeters are worth it in 2026, and how to build a reliable ICC profile in 20 minutes — with SpyderPro and Calibrite in a hands-on check.
Author
Martin Kleinheinz
Photographer · Hannover
Updated
May 25, 2026
You know the frustrating feeling: you've worked on an image for hours, perfected every setting in Lightroom or an alternative, and at the end you see the result on a different screen or in print — and it looks completely different. The colors are too vivid or too washed out, the brightness is wrong, and the whole look feels off.
The issue isn't your skills or the software, it's your monitor. Every screen displays colors differently — some too warm, others too cool, many too bright or too dark. Without calibration you work blind and have no control over the final result of your work.
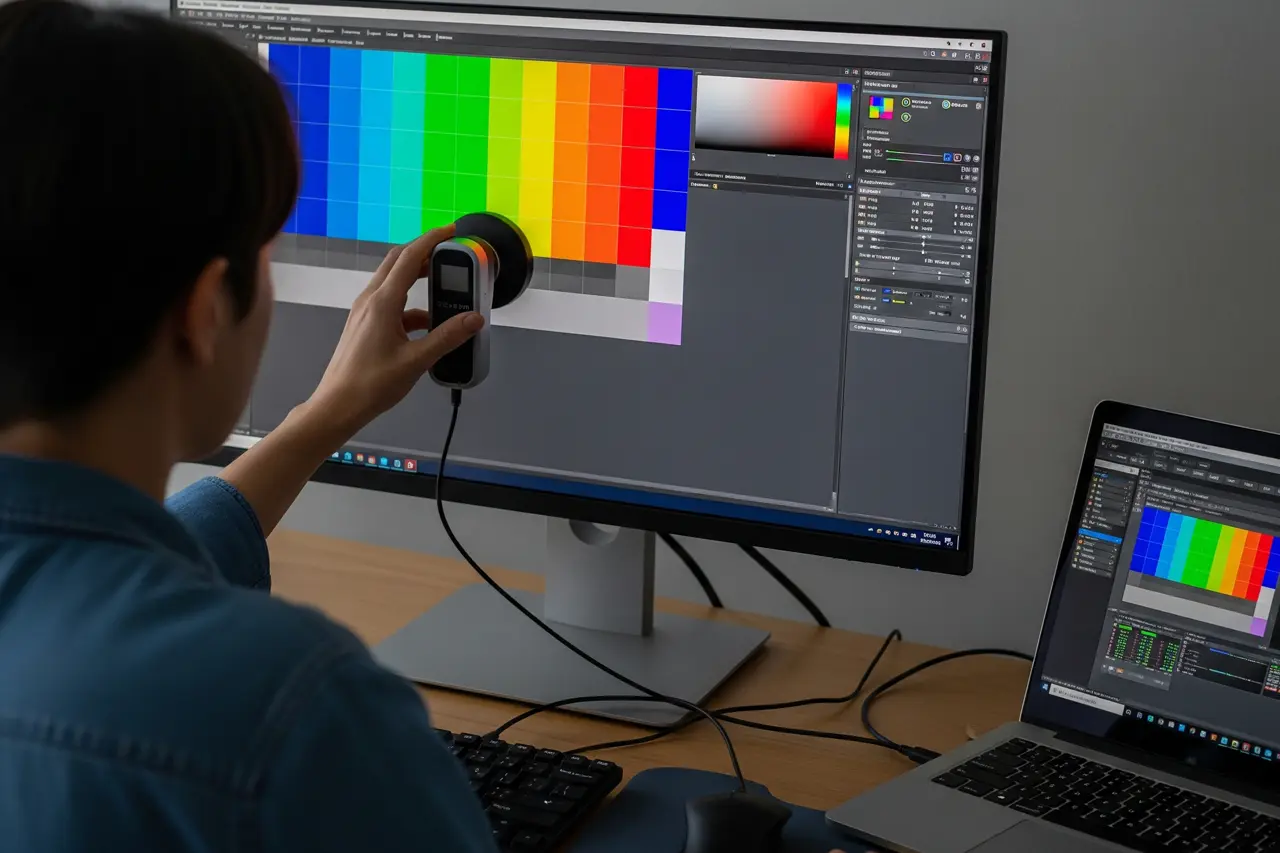
Monitor calibration is the process of adjusting your screen so that it shows colors, brightness and contrast correctly and reproducibly. A small measurement device analyzes your display and creates an individual color profile that ensures that what you see also matches what others see or what gets printed.
In this guide I'll show you step by step how to calibrate your monitor professionally. You'll learn why calibration is indispensable for photographers, which devices are worth it in 2026 and how to do the whole process in a few minutes. If you're still looking for the right monitor for image editing, that's where the hardware overview lives — this article is your calibration workflow.
00
Quick Recommendation
Two Colorimeters, Two Target Groups
For the vast majority of photographers with a classic IPS or VA panel the Datacolor SpyderPro is enough — fast, intuitive, calibrated in 3–4 minutes. If you use OLED, HDR or wide-gamut displays (Apple Studio Display XDR, LG UltraFine OLED Pro, Eizo CG), reach for the Calibrite ColorChecker Display. Both Amazon links are in the recommendation boxes below — without fixed prices on the buttons, since those fluctuate daily.
My two calibration picks for 2026
SpyderPro vs. Calibrite ColorChecker Display
The **SpyderPro** is the fast all-rounder for hobby and semi-pro. The **Calibrite ColorChecker Display** is the choice for OLED, HDR and high-end reference monitors.
Vergleich
Datacolor
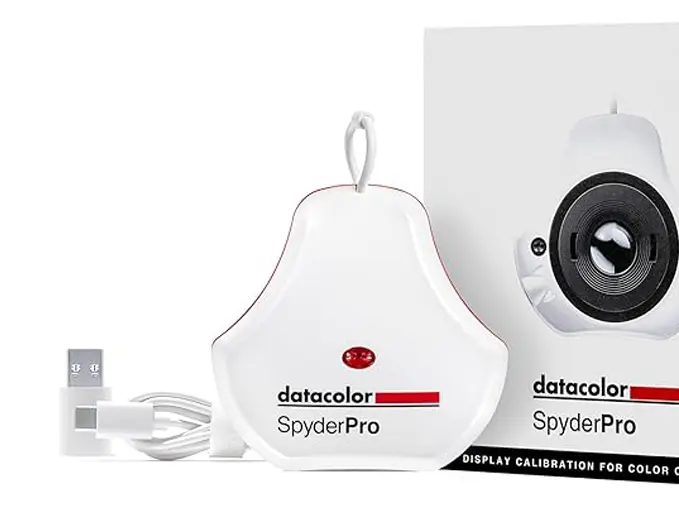
Datacolor SpyderPro
Calibrite
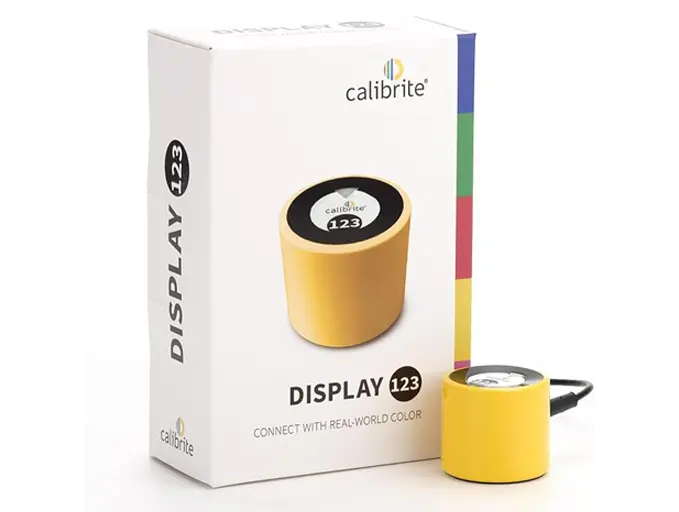
Calibrite ColorChecker Display
Bild
Empfehlung
Best Value
Editor's Choice
Sensor
Colorimeter with 7-color sensor
Colorimeter (filter-based)
ISO-Bereich
LCD · LED · Wide Gamut · IPS/VA
LCD · LED · OLED · Wide Gamut · HDR
Autofokus
SpyderPro · automatic reminders
ccProfiler · DisplayCAL compatible
Detail
Express calibration approx. 3–4 minutes
Full calibration approx. 5–6 minutes
Stärken
+Intuitive software — even for beginners
+Room Light Switching adapts to ambient light
+SpyderProof with your own images
+Multiple monitors with a single license
+Native OLED and HDR display support
+DCI-P3, Rec.2020 and pro presets
+Detailed measurement protocols
+DisplayCAL compatible
Schwächen
−OLED support less mature than Calibrite
−No HDR/XDR mastering like Calibrite's pro variant
−Slightly higher entry price than SpyderPro
−Software a bit more complex for absolute beginners
Geeignet für
Ambitious hobby photographers and designers with classic IPS monitors.
Pros with high-end monitors, OLED or HDR workflows.
Why Monitor Calibration Is Essential for Photographers
Monitor calibration is not just a "nice-to-have" for perfectionists, but an absolute necessity for anyone serious about their photos. The impact of an uncalibrated monitor goes well beyond aesthetic preference.
The problem with color casts and wrong display
Every monitor ships with different factory settings. Many are deliberately configured too bright and oversaturated to look impressive in the electronics store. Others have a bluish or yellowish color cast. That leads to a systematic error in your image editing.
Color casts
Your monitor shows everything too warm or too cool.
Wrong brightness
Images get edited too bright or too dark.
Oversaturation
Colors look unnaturally vivid or muddy.
Contrast issues
Details disappear in the shadows or highlights.
Inconsistency
Different monitors show the same image differently.
Professional consequences and client satisfaction
For professional photographers an uncalibrated monitor can damage business. Clients expect images that look the same on their devices as in your presentation. Prints have to match the digital reference.
A calibrated monitor makes your editing not just more accurate but also more efficient. You make the right decisions from the start and don't constantly have to cross-check between devices or correct again.
Confidence
No more uncertainty in color decisions.
Fewer test prints
Fewer test prints and corrections needed.
Trust
Trust in what you see on the screen.
Consistency
Consistent results across all projects.
Approvals
Faster client approvals.
You work more calmly because you know your decisions stand on solid ground. That leads to better creative results and less workflow stress.
02
Hardware
The Best Calibration Devices 2026 Compared
In 2026 two manufacturers dominate the professional monitor calibration market: Datacolor with the Spyder series and Calibrite (successor to X-Rite) with the ColorChecker devices. Both offer reliable solutions but have different strengths.
Device
Target group
Duration
Highlights
Datacolor SpyderPro
Photographers / designers
3–4 min.
Room Light Switching, easy to use
Calibrite ColorChecker Display
Pros / HDR / OLED
5–6 min.
Wide gamut, HDR/XDR up to 10,000 nits
Calibrite ColorChecker Studio
All-in-one pros
8–10 min.
Monitor + printer + optional camera/scanner
SpyderX Elite (predecessor)
Budget-conscious
4–5 min.
Proven, often still cheap used
Calibration devices 2026 at a glance — prices intentionally left to the shop, since they fluctuate daily.
Datacolor SpyderPro: the all-rounder for photographers
The Datacolor SpyderPro is my top pick for most photographers. It combines easy operation with professional results. The software is intuitive and walks you through the calibration process step by step.
Room Light Switching
Automatic adjustment to ambient light.
Express calibration
Only 3–4 minutes for standard displays.
SpyderProof
Before/after comparison with your own images.
12 presets
Different target profiles for different uses.
Unlimited displays
Calibration of multiple monitors with one license.
The software automatically detects your display type and suggests optimal settings. That makes calibration effortless even for beginners.
Best Value
Datacolor
Datacolor SpyderPro
The all-rounder for photographers
Fast, precise colorimeter with Datacolor's latest Spyder sensor generation. Room Light Switching, express calibration in 3–4 minutes, SpyderProof before/after comparison and unlimited monitor licenses — ideal for IPS and VA displays in a photo workflow.
Was überzeugt
+Intuitive software — even for beginners
+Room Light Switching adapts to ambient light
+SpyderProof with your own images
+Multiple monitors with a single license
Was Du wissen solltest
−OLED support less mature than Calibrite
−No HDR/XDR mastering like Calibrite's pro variant
Editor's Statement
“My price-performance pick for most photographers”
Calibrite ColorChecker Display: for HDR and high-end displays
The Calibrite ColorChecker Display (successor to the i1Display Pro) targets demanding users with high-end monitors. It supports HDR displays and can measure brightness up to 10,000 nits — relevant for Apple XDR, OLED editing monitors and wide-gamut panels.
HDR support
Calibration of Apple XDR and other HDR displays.
High precision
Measurement range up to 10,000 cd/m².
Advanced targets
DCI-P3, Rec.2020 and other color spaces.
Professional presets
Targets for video, print and web.
Quality assurance
Detailed measurement protocols and quality reports.
Editor's Choice
Calibrite
Calibrite ColorChecker Display
Pro calibration with OLED & HDR support
Successor to the X-Rite i1Display Pro under the Calibrite brand. ccProfiler software, wide-gamut and OLED displays, HDR/XDR measurement range up to 10,000 nits — the gold standard if you calibrate Apple Studio Display XDR, OLED editing monitors or print reference displays.
Was überzeugt
+Native OLED and HDR display support
+DCI-P3, Rec.2020 and pro presets
+Detailed measurement protocols
+DisplayCAL compatible
Was Du wissen solltest
−Slightly higher entry price than SpyderPro
−Software a bit more complex for absolute beginners
Calibrite ColorChecker Studio: all-in-one for pros
The ColorChecker Studio is the complete solution for professional studios. It combines monitor and printer calibration in one device and can also calibrate cameras and scanners.
Monitor
Monitor calibration (like Display Pro).
Printer
Printer profiling.
Projector
Projector calibration.
Camera
Camera profiling.
Scanner
Scanner calibration.
Lightroom Presets9 film looks inspired by Portra, Kodak & Fuji —View pack →
03
Guide
Step-by-Step: Calibrating Your Monitor Correctly
Calibration is easier than you'd think and only takes a few minutes. I'll walk you through the complete process using the Datacolor SpyderPro as the example — the steps are very similar with Calibrite ccProfiler.
Preparation: setting the monitor up optimally
Good preparation is critical for precise calibration results. Do these steps about 30 minutes before the calibration:
Technical prep:
Warm up the monitor
Leave the monitor on for at least 30 minutes.
Factory settings
Reset the monitor to factory defaults via the OSD menu.
Auto-brightness
Turn off all automatic brightness adjustments.
Color temperature
Select 6500K in the monitor menu (if available).
Gamma
Set to 2.2 (standard for sRGB).
Optimize the environment:
◆Darken the room or use constant indirect lighting.
◆Avoid direct light on the monitor.
◆Close all programs except the calibration software.
◆Remove the screensaver and wallpaper.
Software installation and device setup
Installing the SpyderPro software:
1
Download the current software from the Datacolor website.
2
Install the software but don't start it yet.
3
Connect the SpyderPro device to your computer via USB.
4
Launch the SpyderPro software.
5
Enter your serial number (printed on the device).
First launch and device detection:
◆The software automatically detects your SpyderPro model.
◆Choose your monitor type (desktop/laptop).
◆Enter the manufacturer and model of your monitor.
◆Choose the backlight technology (LED, OLED, etc.).
Running the actual calibration
Choose calibration settings:
◆Gamma: 2.2 (standard for sRGB).
◆White point: 6500K (daylight).
◆Brightness: 120 cd/m² (optimal for photo editing).
◆Room Light: enable for automatic ambient light compensation.
Start the measurement:
1
Choose "FullCAL" for the most precise calibration.
2
Remove the protective cap from the SpyderPro.
3
Position the device on the white circle on the screen.
4
Use the suction cup for a secure hold.
5
Tilt the monitor slightly backward for optimal contact.
6
Click "Start" and wait for the automatic measurement.
During calibration the software shows different colors and brightness levels that the SpyderPro measures. Don't touch the device and avoid shaking the monitor.
Evaluating results and activating the profile
After the measurement the software automatically creates an ICC profile for your monitor and shows the calibration results.
Interpreting the results:
◆Color accuracy: Delta-E values below 2 are excellent.
◆Brightness: should be close to the target (120 cd/m²).
◆White point: deviation from 6500K should be minimal.
◆Gamma: curve should be close to 2.2.
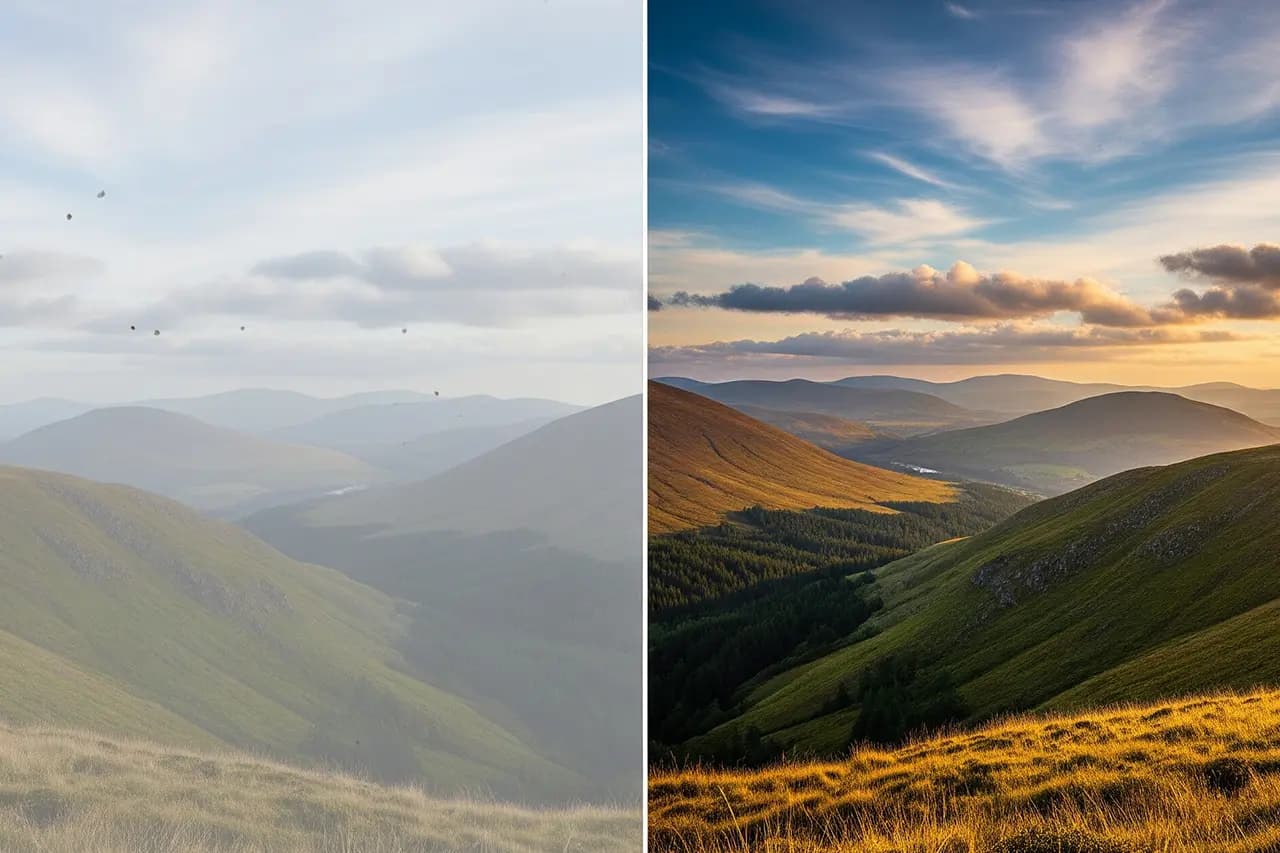
Using the before/after comparison:
1
Open the SpyderProof function.
2
Load one of your own images.
3
Compare the calibrated with the uncalibrated profile.
4
Pay particular attention to skin tones and neutral grays.
5
Save the new ICC profile as the default.
04
Troubleshooting
Common Problems and Fixes
Despite the simple operation, monitor calibration can run into various issues. Here are the most common difficulties and their fixes.
Hardware problems and device detection
SpyderPro is not detected:
◆Check that the USB cable is correctly connected.
◆Try a different USB port (directly on the computer, not through a hub).
◆Run the software as administrator (Windows).
◆Update the device drivers via Device Manager.
◆Uninstall and reinstall the software.
Unstable measurements or errors:
◆Gently clean the sensor lens with a microfiber cloth.
◆Make sure there is full contact between sensor and monitor.
◆Avoid shaking during measurement.
◆Close other programs that access the monitor.
Software problems and compatibility
ICC profile is not applied:
◆Check in Windows color settings whether the correct profile is active.
◆Restart Lightroom/Photoshop after calibration.
◆Check that color management is enabled in the software.
◆On macOS: check the ColorSync settings in the system menu.
Differences between programs:
◆Only color-managed programs use the ICC profile.
◆Web browsers often show uncalibrated colors.
◆Gaming programs usually ignore ICC profiles.
◆Office programs rarely use color management.
Issues with calibration results
Monitor looks too dark/warm after calibration:
◆That is normal! Your monitor was misadjusted before.
◆Give yourself 2–3 days to get used to the correct colors.
◆Compare prints with the screen display to verify.
◆With extreme deviations: have the monitor hardware checked.
High Delta-E values (poor color accuracy):
◆Old monitor: hardware limits reached.
◆Cheap TN panels: fundamentally poorer color reproduction.
◆Defective monitor: backlight or panel damaged.
◆Wrong display technology chosen in the software.
05
Maintenance
Maintenance and Regular Calibration
Monitor calibration isn't a one-off. Displays change over time, and regular maintenance is critical for consistently good results.
How often should you calibrate?
Calibration frequency depends on your monitor type and how intensively you use it:
Pro monitors (IPS / mini-LED)
Every 2–4 weeks.
IPS monitors (consumer)
Monthly.
VA panels
Every 6–8 weeks.
OLED displays
Every 2–3 weeks (faster degradation).
Older monitors (>3 years)
Weekly with heavy use.
Signs of needed re-calibration:
◆Prints deviate noticeably from the screen.
◆Colors look different than usual.
◆Brightness has changed.
◆After graphics card driver updates.
Monitor care for long-term accuracy
Optimize the environment:
◆Use constant room lighting.
◆Avoid direct sunlight on the monitor.
◆Don't place the monitor near heat sources.
◆Dust-free environment for longer lifespan.
Technical maintenance:
◆Regularly clean the monitor surface with a microfiber cloth.
◆Free the cooling vents from dust.
◆Check cables and connections.
◆Keep graphics card drivers up to date.
Calibrating multiple monitors
With a dual-monitor setup it's important to calibrate both displays, even if you only use one for image editing. Color differences between monitors are distracting and lead to wrong decisions.
Multi-monitor workflow:
1
Calibrate the main monitor for image editing first.
2
Use identical settings for the secondary monitor.
3
Accept small differences between different panel types.
4
Use the more precise monitor for final color decisions.
06
Workflow
Integration in the Photo Workflow
A calibrated monitor is just the first step toward a color-managed workflow. Integrating it into your daily work requires a few adjustments and considerations.
Transparency notice: This article contains affiliate links. If you buy through them I earn a small commission at no extra cost to you. Editorial content is unaffected.
◆ Newsletter
Stay in the loop.
Camera and photography news, honest gear tests and new articles — in your inbox. Infrequent but relevant. No spam, unsubscribe anytime.