
Black Background for Photos: Physics, Materials, and 3 Methods

Why distance quarters your light (−2 stops), why molton beats paper, and how to get studio, location, and flash setups to true black — plus Lightroom cleanup without wrecked hair edges.

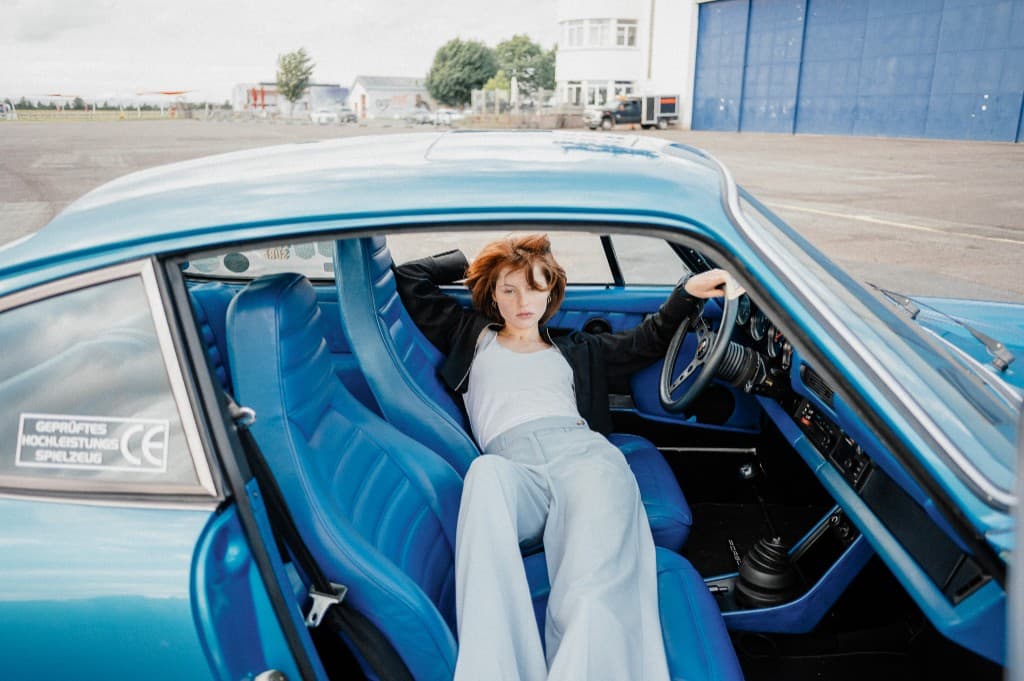
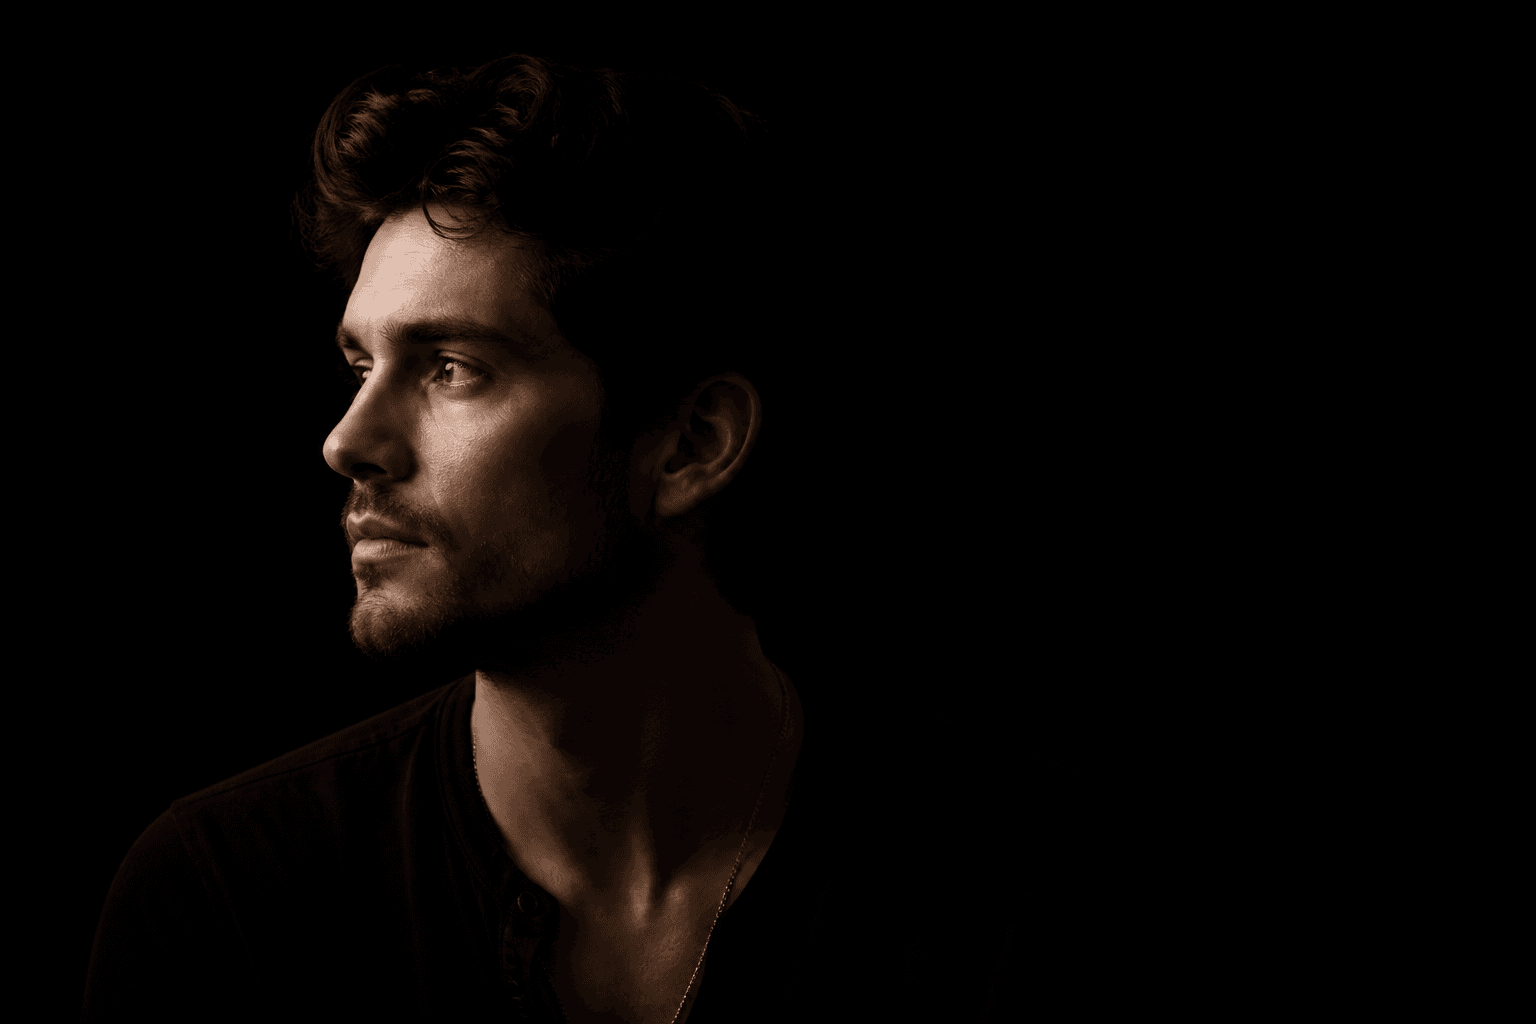
Black background for photos — portrait with a deep black studio background
Martin Kleinheinz
Author
Martin Kleinheinz
Photographer · Content Creator · Hannover
Updated
July 19, 2026

You want a portrait that lands instantly: sharp face, clear gaze — and nothing behind it. No bookshelf, no outlet, no hotel curtain. Just black. Sounds simple. In practice, it often turns into a dark gray smudge with wrinkles and stray light.

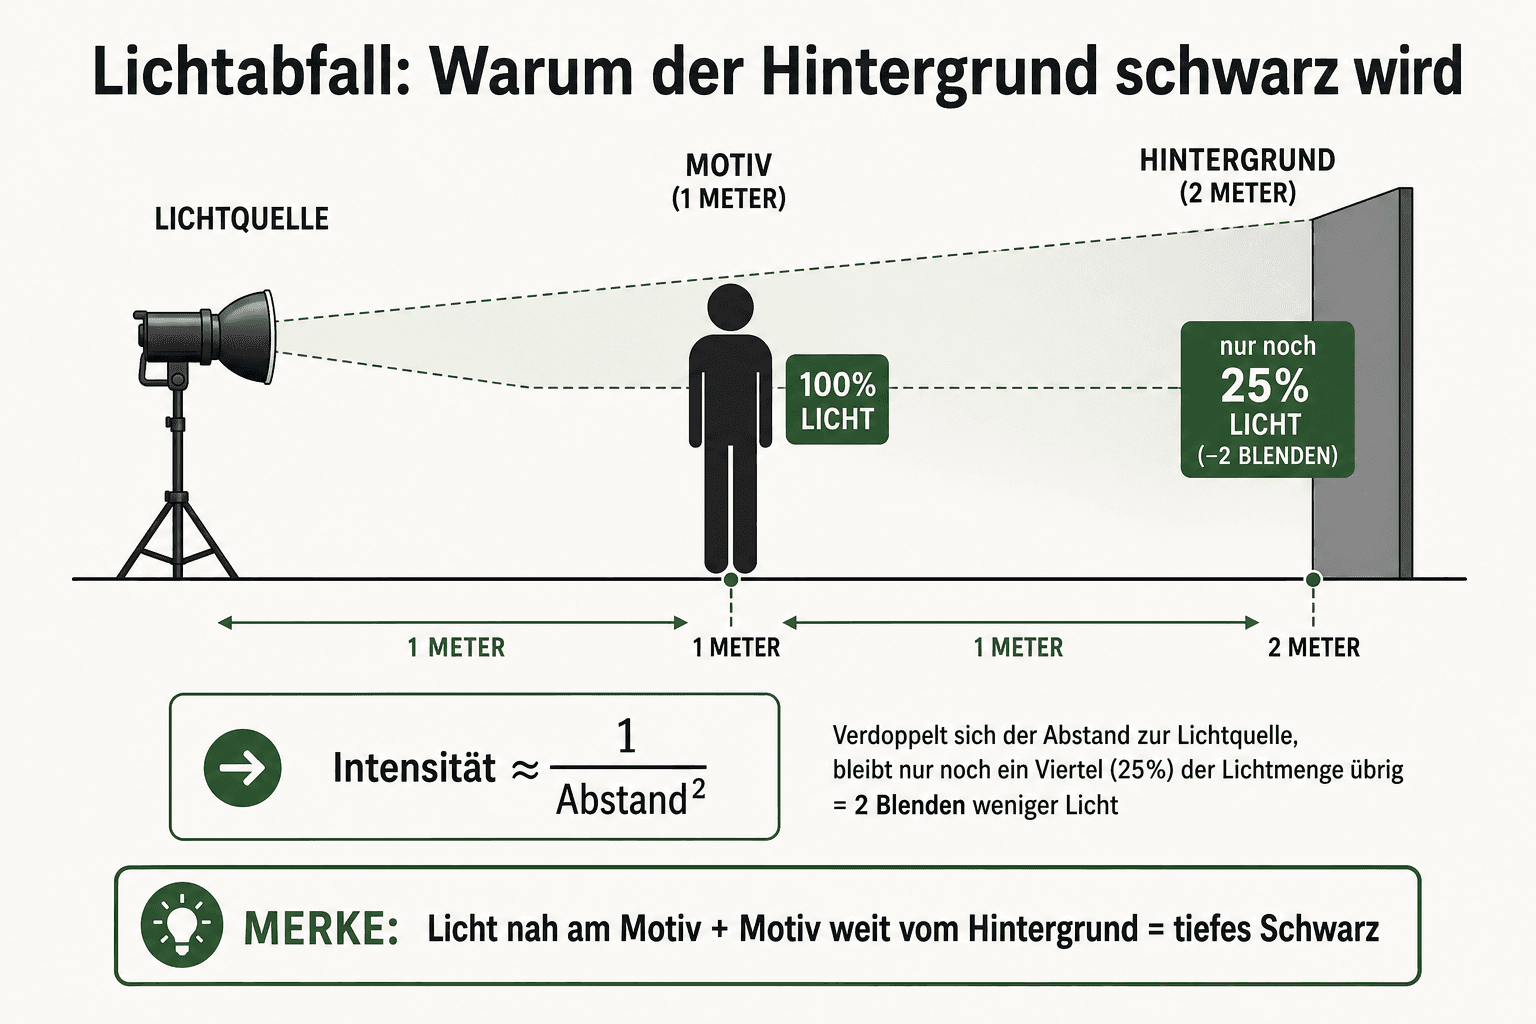
The crux is physics, not magic. Light falls off with the square of the distance. Double the distance from your light source (or your lit subject) to the background from 1 m to 2 m, and the background receives only a quarter of the light — that's two stops less. Then comes material: molton absorbs, paper reflects, cheap polyester often shines back. Only after that do flash, available light, and Lightroom enter the picture.

I use a black background mainly for business headshots, clean portraits, and product-adjacent looks — whenever the background would distract instead of support. Here you get three practical routes, the studio-vs-location-vs-product decision tree, and honest product picks without brand theater.
00
Quick

Quick Start: Three Ways to a Black Background

Not sure where to start? Pick the path that fits your setup — details and the physics follow right after.

1. Material + Distance (Studio / Home)
Black fabric or paper, subject and light pulled away from the background. Best control. Top pick: stage molton.
2. Available Light (Outdoor / Location)
Put the subject in the brightest spot, keep the background in shadow. Expose for the face — the rest falls off. No stand needed.
3. Flash to Black (Room / Event Corner)
Kill the ambient light, flash only the subject. Use distance to the wall. Details: Flash Photography Guide.
Top 4

Absorption · Budget · Mobile · Stand

**#1 Molton** for deep black. **#2 Paper roll** as a budget studio. **#3 Foldable backdrop** for on the go. **#4 Stand system**, when a roll or fabric needs to stay up permanently.

Vergleich
Stage / Molton
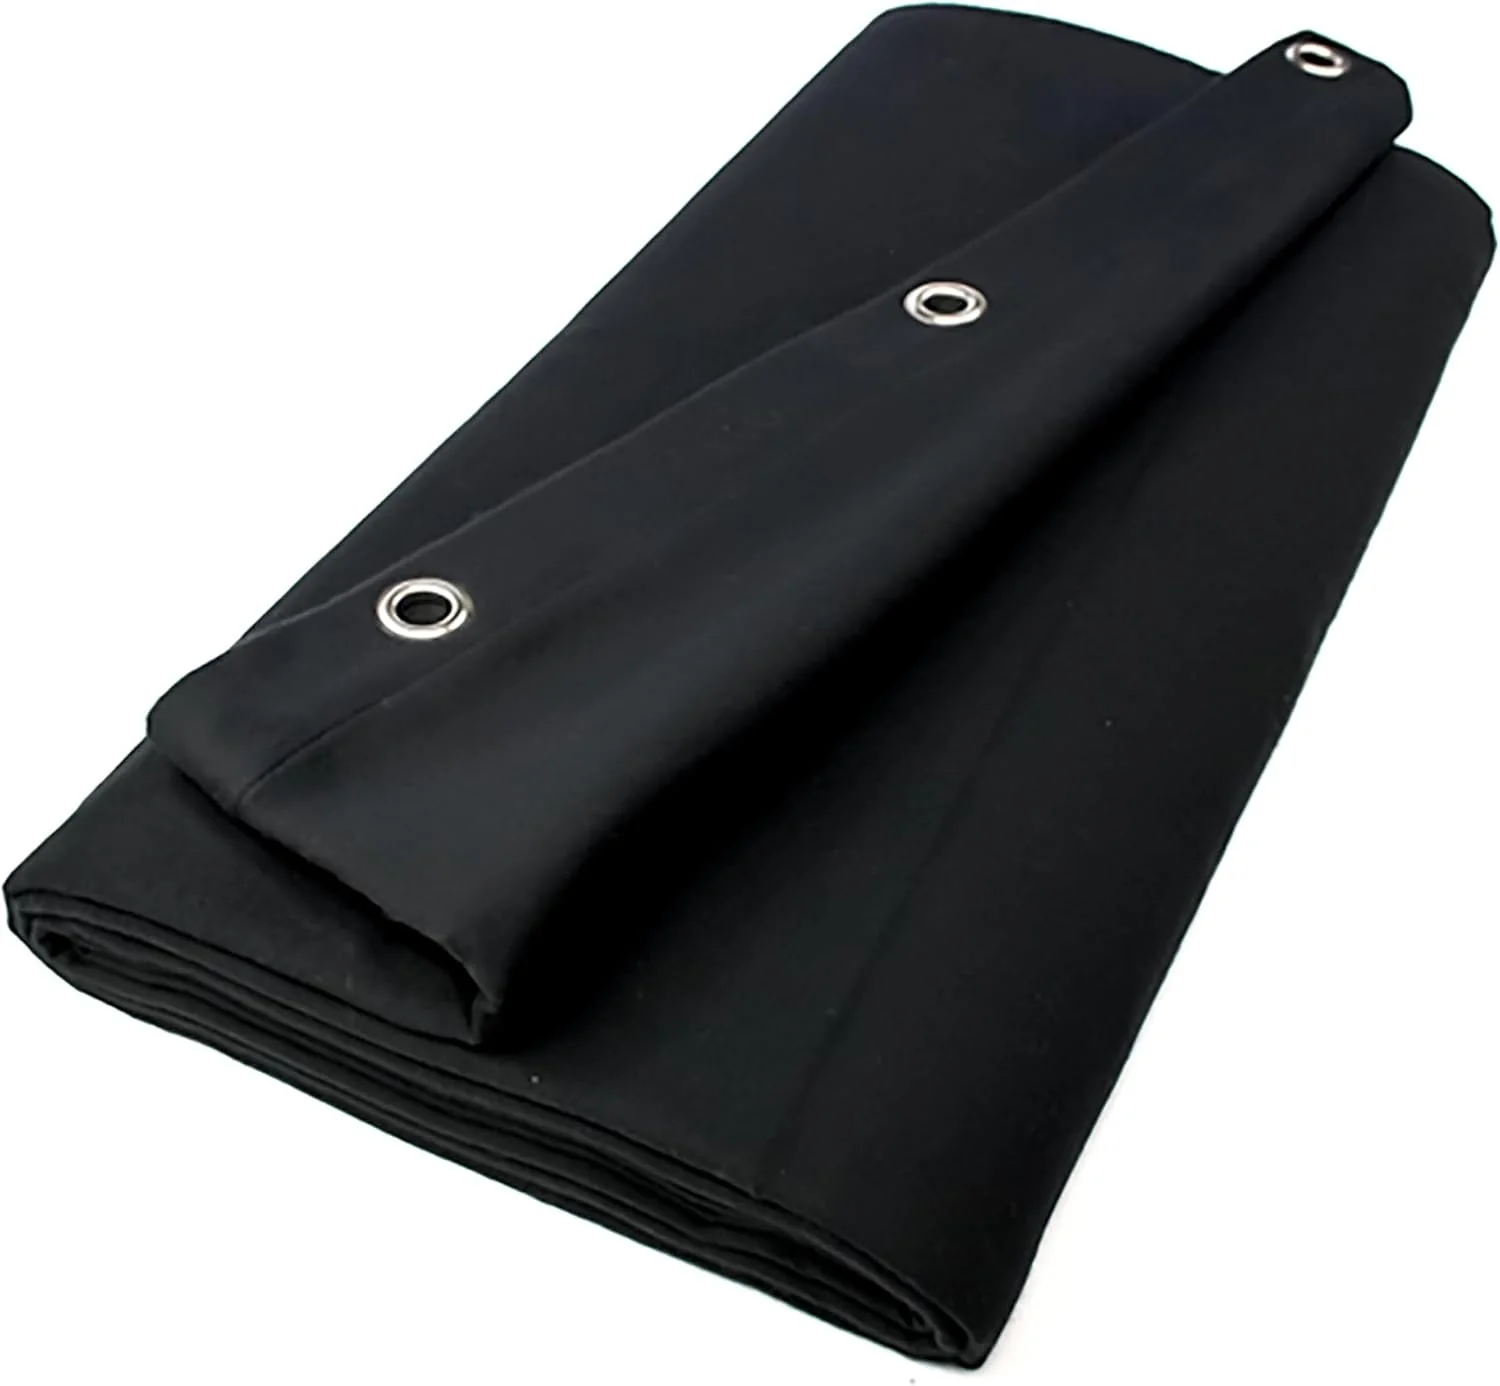
Stage Molton Black 6×5 m (B1)
walimex pro
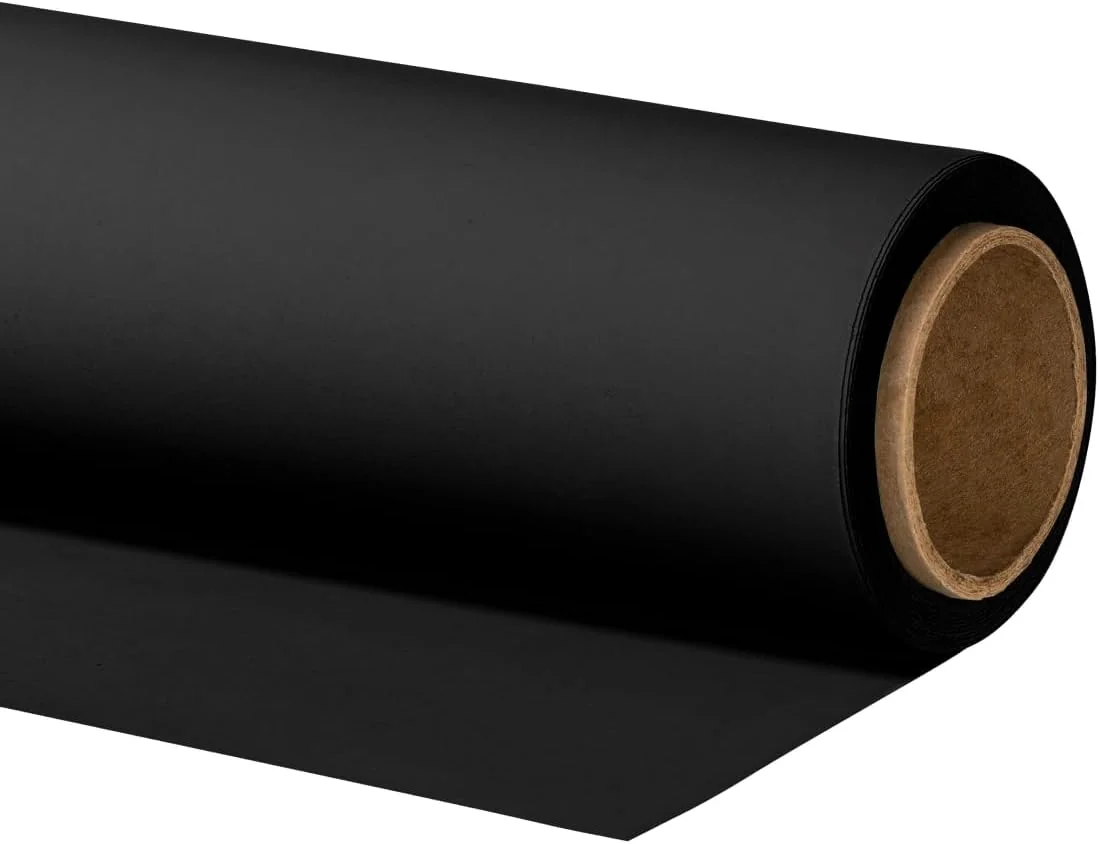
walimex pro Background Cardboard Black
walimex pro
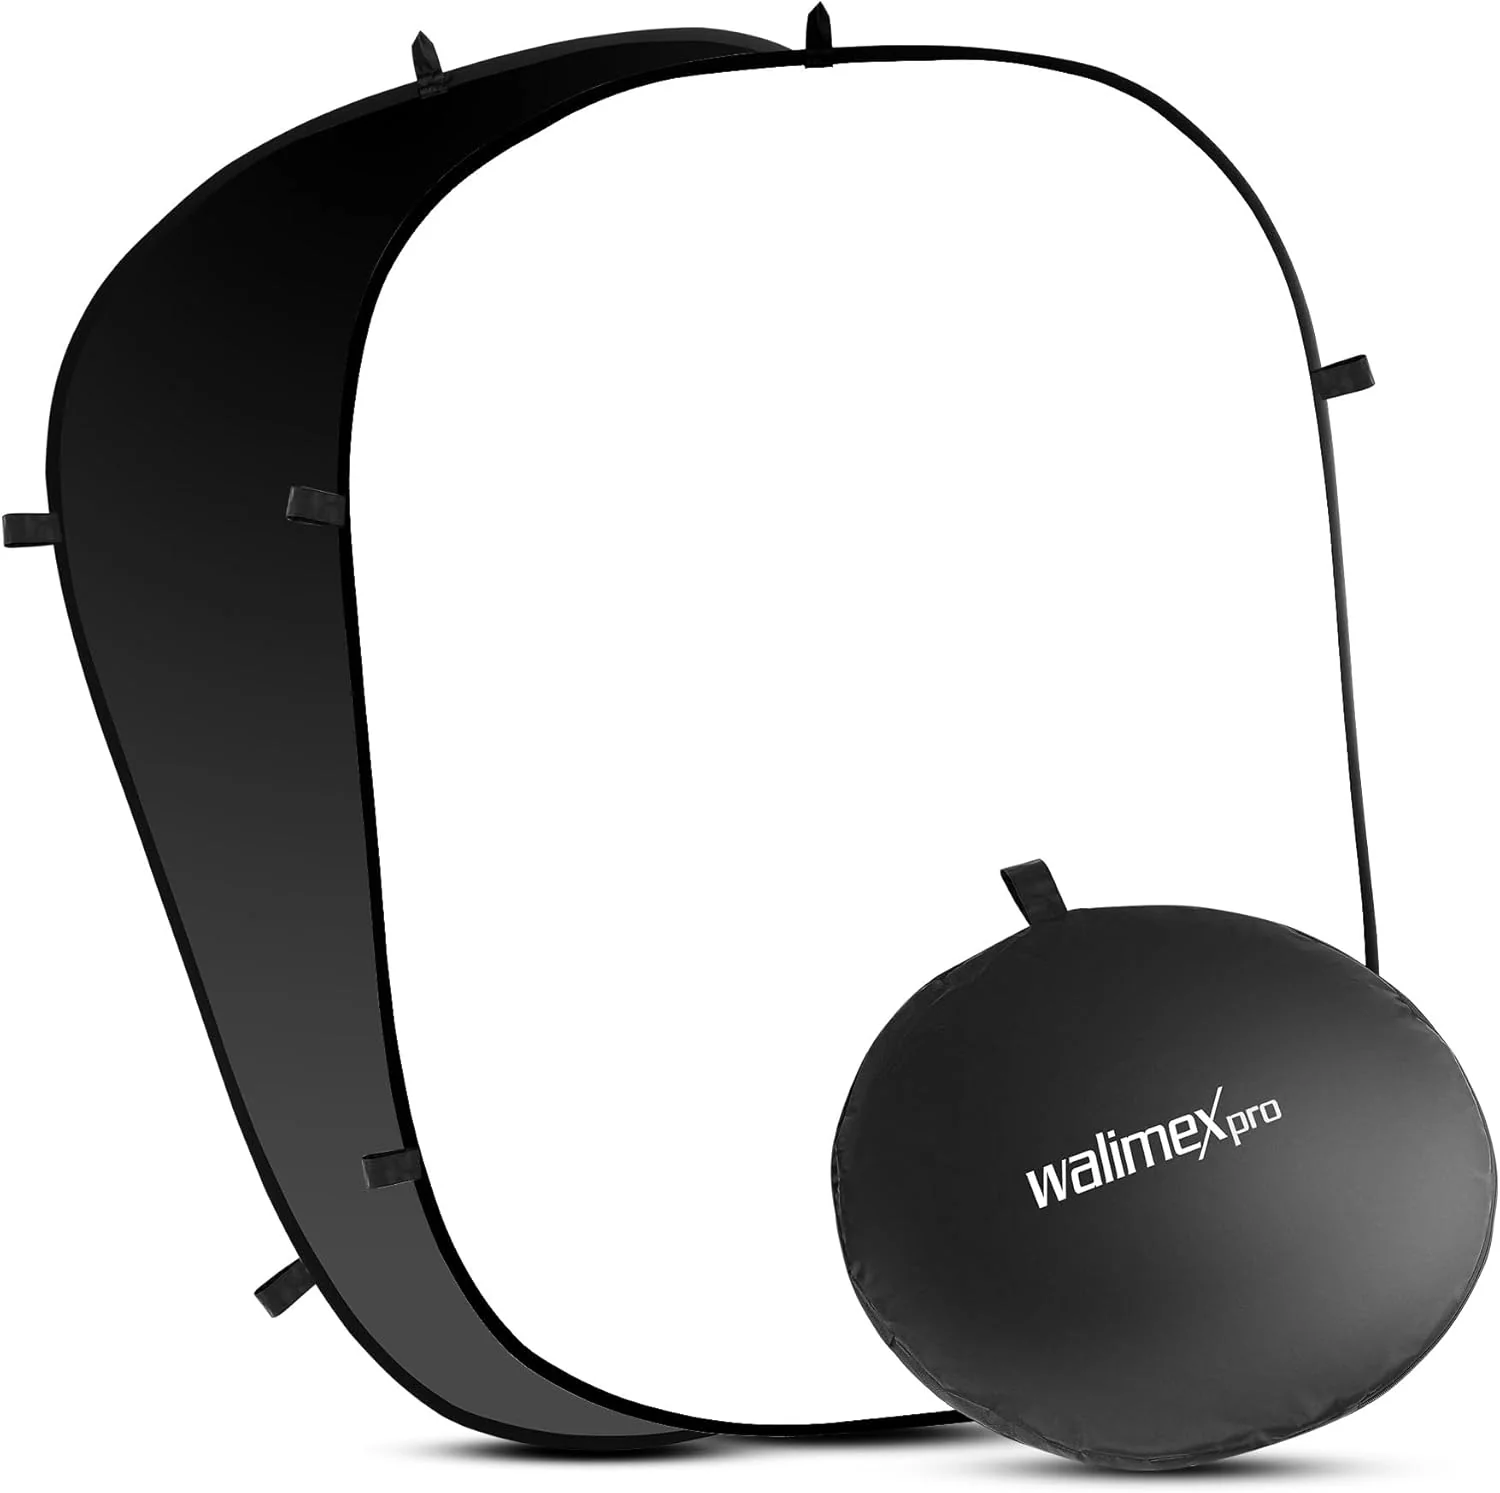
walimex pro Foldable Backdrop Black/White
walimex pro
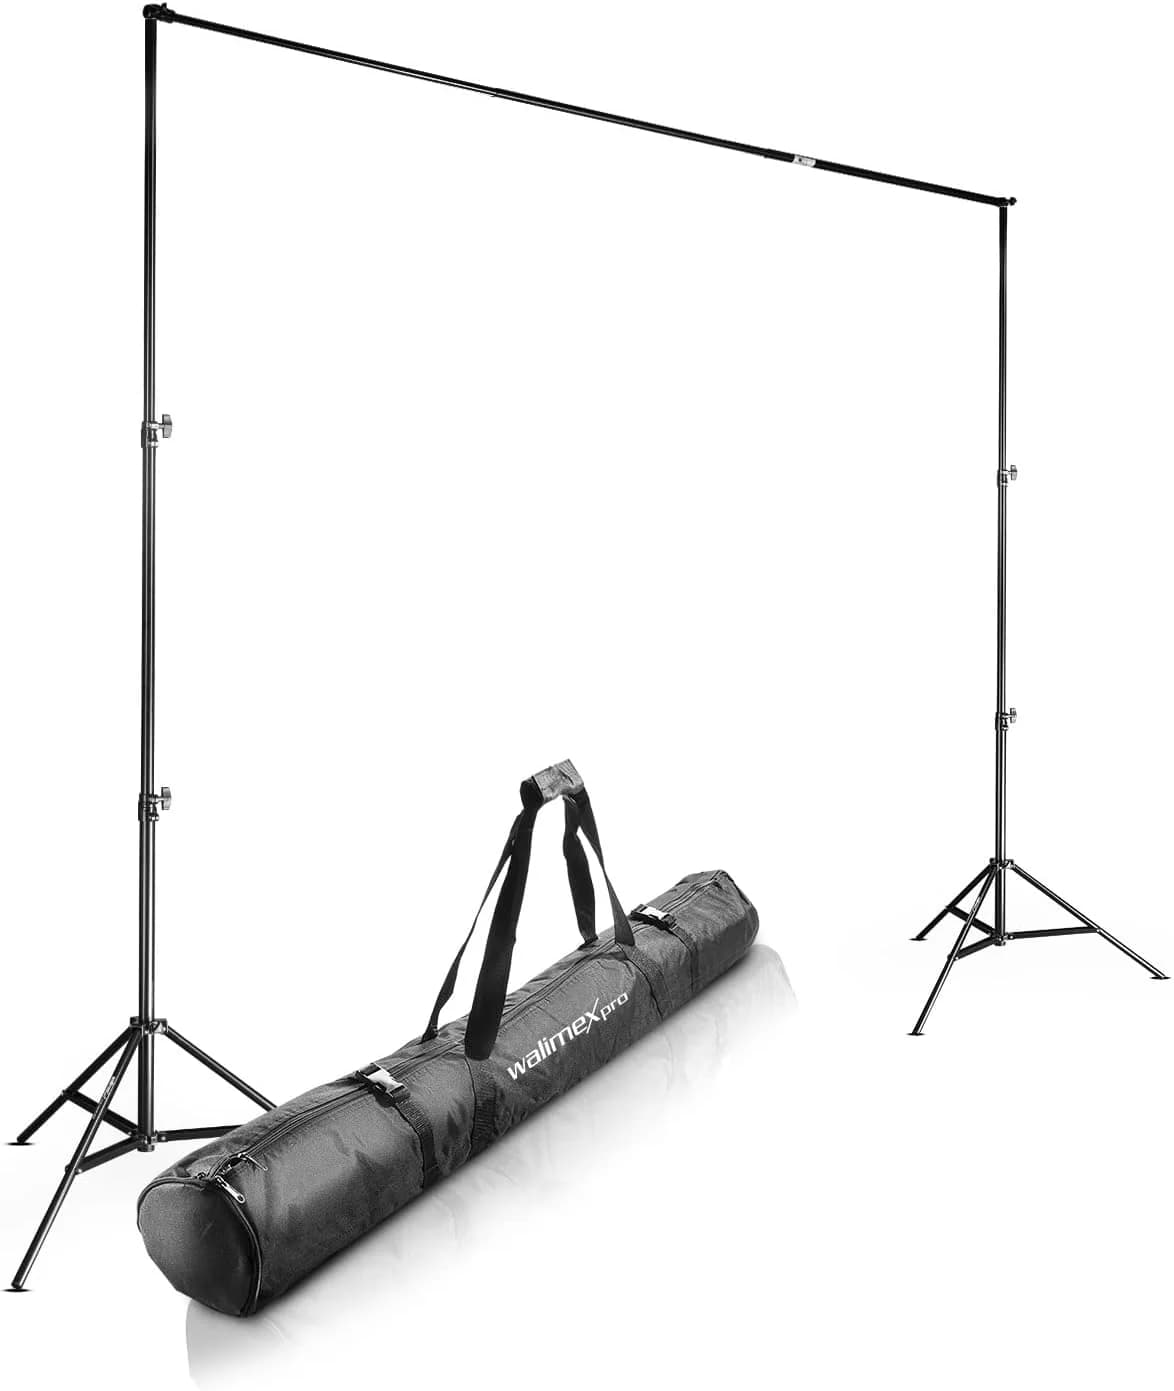
walimex pro Background System
Bild
Stage Molton Black 6×5 m (B1)
walimex pro Background Cardboard Black
walimex pro Foldable Backdrop Black/White
walimex pro Background System
EmpfehlungTop PickBudget StudioMobileSetup
SensorStage molton, approx. 300 g/m²Background cardboard / paperFold fabric / pop-upBackground stand system
ISO-BereichBlackBlackBlack + WhiteRolls & fabric
Autofokusapprox. 6 × 5 mRoll (studio standard)150 × 200 cmPortable / collapsible
DetailHigh — little bounce-backMedium — reflects a bitMediumCardboard or molton
Stärken
  • +Absorbs light better than paper and polyester
  • +Versatile: background, flag, blackout
  • +Large enough for a portrait and small groups
  • +Grommets for quick hanging on a system
  • +An affordable entry point for studio and home-office shoots
  • +Smooth surface — no visible fabric texture
  • +Good for business headshots and product-adjacent portraits
  • +Sets up fast with a stand system
  • +Very portable — sets up in seconds
  • +White side doubles as a fill / bright BG
  • +Frame built in — no separate fabric system needed
  • +Fits location and content shoots
  • +Makes a paper roll or molton actually usable
  • +Collapsible — for home studio and occasional location use
  • +Width usually enough for portrait and half-body
  • +An affordable entry into a fixed setup
Schwächen
  • Wrinkles show if lit too close and too brightly
  • Heavier and bulkier than a paper roll
  • May need stretching for a smooth look
  • Reflects more light than molton — needs more distance
  • Creases and gets dirty; the roll needs to be advanced
  • Less portable than a foldable backdrop
  • Smaller than a large molton — limited framing
  • The frame/edge can show up in wide shots
  • Absorbs less than molton — needs more distance
  • Not a background on its own — buy material separately
  • Check stability with very wide fabric
  • Unnecessary if you only use a foldable backdrop
Geeignet fürStudios, home studios, and anyone who wants deep black without post-processing drama.A fixed studio or recurring home setups with a background stand.Location work, mobile business portraits, and tight rooms without a stand system.A home studio and anyone wanting to mount a paper roll or molton permanently.
Wo kaufen
01
Physics

Light Falloff: Why Distance Turns Your Background Black

Where no light lands, the image goes black — period. A "black" background only works if it receives less light than your subject. You control that through distance, light shaping, and material. The lever most people underestimate: the inverse square law.

1 m → 2 m = a Quarter of the Light = −2 Stops

Illumination falls off roughly with the square of the distance to the light source. Double the distance and you're left with ¼ of the intensity. In stops: −2 EV. From 1 m to 3 m: 1/9 of the light — roughly a bit more than −3 stops. The diagram shows the falloff clearly:

Diagram of light falloff: doubling the distance quarters the light on the background (−2 stops)
Light falloff — doubling the distance ≈ ¼ the intensity ≈ −2 stops on the background
Distance (relative)Light AmountStops (approx.)In Practice
1× (baseline)100%0 EVSubject/light close to BG → often gray
25%−2 EVFirst meaningful step
≈ 11%≈ −3.2 EVBackground drops noticeably
6.25%−4 EVOften already "nearly black" before Lightroom

Approximation for point-like light sources — softboxes vary slightly, but the direction holds

Important in practice: the softbox often sits close to the face, while the background sits farther back. What matters is the light→background distance — not just subject→background. Pull the subject and the light away from the background together. More on controlling EV: Exposure Correction.

This holds for studio work just as much as for available light and flash. The methods only differ in where the subject light comes from and how you keep the background away from it.

35mm & 120mm film presets — Lightroom presets by Martin Kleinheinz
Lightroom PresetsNew

Photos with film character

9 Lightroom presets inspired by Portra, Kodak, Fuji & Ilford — for street, portrait and landscape. One-time €29, no subscription.

35mm & 120mm Film Lightroom Presets · €29

View film presets9 presets · XMP · lifetime
02
Method 1

Material + Distance: Studio and Home Setups

The classic for business headshots and controlled portraits: black material behind the person, light only on the face (and lightly on the shoulders if needed), keeping the background as dark as possible.

Material Hierarchy: What Actually Absorbs

RankMaterialAbsorptionWhen It Makes Sense
1Stage molton / velvetHighDeep black, flags, home studio
2Background paper / cardboardMediumBudget, smooth surface, fixed setups
3Cheap polyester / shiny fabricLow–mediumOnly with plenty of distance & tight flags

Ranked by light absorption — not by the marketing photo on the packaging

Molton is rough and dark — light gets scattered and absorbed instead of bounced cleanly back. Paper is smoother and reflects more; with distance and a grid, it still holds up well. Cheap polyester often shines: you'll see hotspots and fabric texture the moment stray light hits it. No contrast slider rescues that elegantly.

  • Keep the subject at least 1–2 m from the background — more if the room allows
  • Light from the front/side, never aimed at the background
  • Softbox with a grid or flags: stray light is black's enemy
  • A tele lens from around 85mm helps compress the background tighter and calmer — see also Portrait Photography Tips

For a fixed setup: a stand system + paper roll or molton. For on location: a foldable backdrop. Product picks and verdicts are below in section 09.

03
Method 2

Available Light Outdoors: Black Without a Stand

No studio? No problem. Outdoors and on location you create black through contrast: bright subject, dark background — and expose for the bright subject.

1. Find the brightest spot for your subject
Sun through a gap, a bright window, a doorway. The person stands in the light.
2. Pick a dark background
Shadow under trees, a dark hedge, a dark interior corner, a garage door in shade — not the bright sky behind the head.
3. Expose for the face
Meter / use Exposure Correction so the skin looks right. The shadowed background then often already falls off hard. Slight underexposure (−0.3 to −1 EV) deepens the effect.

Backlight with a bright sky behind the head works against you: the background turns bright, the face goes dark. Turn so darkness sits behind the person and the light comes from the front or side. A reflector or a bright floor can lift the face a touch more — increasing the contrast against the shadowed BG.

For settings where this look works well, check out the Photoshoot Ideas as well.

04
Method 3

Flash to Black: Ambient Off, Subject On

With flash, you crank contrast to the max — in any room or outdoors at dusk. The logic: expose so dark that without flash the image is black. Then flash only the subject. Whatever the flash doesn't reach stays black.

Here's How You Do It

  • Test flash off / ambient: shorter shutter, smaller aperture, lower ISO — until the frame is practically black
  • Flash on the subject: set power so the face is exposed correctly
  • Keep the subject→background distance large — light falloff (section 01) does the rest
  • Pair aperture with flash power; watch the sync speed (often 1/200–1/250 s, depending on the camera)

The brighter the ambient, the harder you have to suppress it (shorter shutter, smaller aperture, lower ISO), and the more flash power you'll need. In dark rooms, a little power often suffices. Fundamentals and sync practice: Flash Photography Guide.

At events, I use this deliberately in dark corners: ambient down, one off-camera flash on the face — the background disappears without me having to set up molton. For planned headshots, though, material + distance remains the cleanest solution.

05
Setup

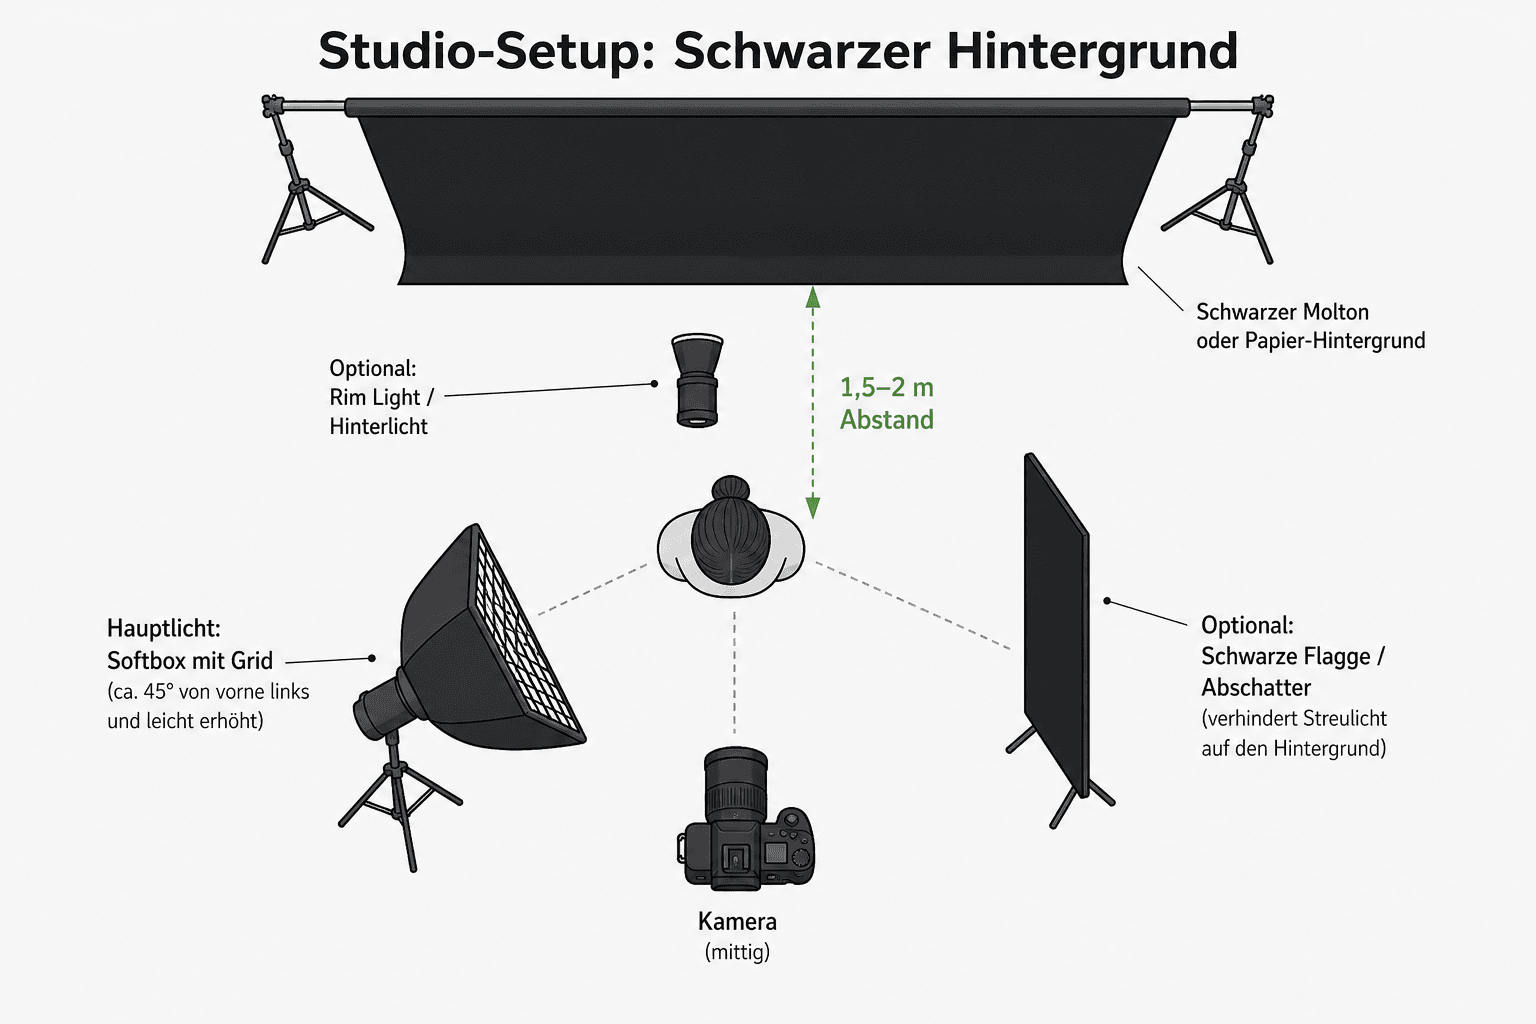
Studio Setup From Above: Where the Light Sits

One clear top-down image helps more than ten paragraphs. Here's what a practical portrait setup with a black background looks like:

Top-down setup: camera, subject, softbox positioned with distance to the black background
Studio setup — subject and light separated from the background, softbox front-side
  • Background against the wall / on a stand — stretched as wrinkle-free as possible
  • Person in front, not "glued" to the fabric
  • Main light front-side (roughly 30–45°), optionally a touch from above
  • Optional: a black flag (flag/molton) against stray light toward the camera or BG side
  • Optional: a weak rim light only if you want edge separation — otherwise the BG stays black more easily

Does this fit the rest of your photography equipment? Yes — a stand, one piece of fabric or a roll, and one directional light are enough. More gear doesn't replace distance.

Lightroom Presets9 film looks inspired by Portra, Kodak & Fuji —View pack

06
Decision

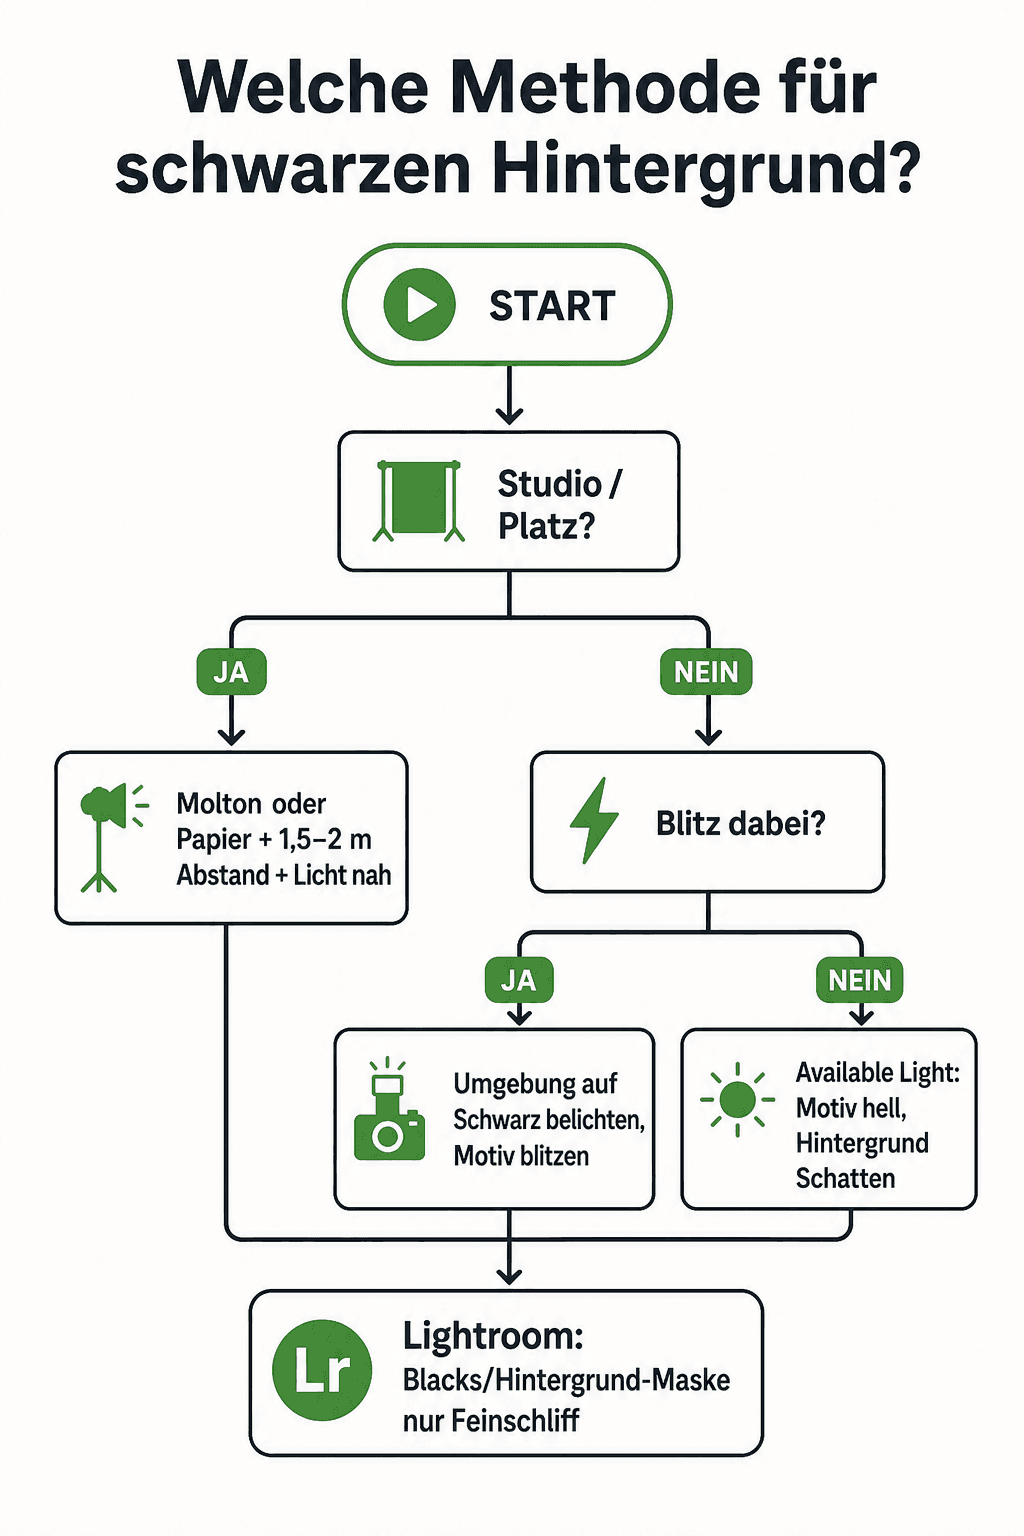
Decision Tree: Studio vs. Location vs. Product

Instead of buying everything, walk the tree. At the top, your use case decides — at the bottom, you land on the method and material:

Black background decision tree: studio, location, or product photography
Decision tree — studio / location / product mapped to method and material
Studio / Home Studio
Molton or paper + stand. Method 1. Optionally add flash (Method 3) for an even harder cut.
Location / Business On-Site
Foldable backdrop or available light (Method 2). No stand? Window + dark room depth.
Product / Flat-Lay-Adjacent
A paper roll is often cleaner (no fabric texture). Plenty of distance, tight light, possibly a black tent/flag. Glossy products: watch for reflections in the BG.
07
Post-Processing

Lightroom: Deepen the Black — Without a Hair-Edge Disaster

Even with a good setup, the RAW file often still holds a trace of detail in the background. In Lightroom, you pull that down — carefully. Whoever slams the AI background mask straight to −2 EV usually sees the cut at the hair and shoulders.

Global First, Then Local

  • Lower the Blacks slightly — this deepens the background and shadows
  • Keep Whites / highlights on the subject, or lift them slightly — contrast without a soft look
  • Fine-tune exposure only — don't try to "save" the whole frame
  • Optional: contrast +10 to +20 — not straight to +80

AI Background Mask: A Tool, Not Autopilot

If global adjustments aren't enough: mask the background and lower exposure/blacks slightly. Then zoom in: hair edges, glasses frames, dark clothing. Does the edge look cut-out-of-a-catalog? Pull it back. 70% clean black beats 100% with a plastic edge.

If you're still at the start of your editing journey: Photo Editing for Beginners. The goal stays: get as close to black as possible on set — Lightroom is only fine-polishing.

08
Practice

Mistakes That Create a Gray Background

Most "why isn't this turning black?" cases are the same handful. Short and clear:

Too close to the background
The classic. 40 cm distance + a softbox = a lit-up piece of fabric. Pull the subject and the light away.
Uncontrolled stray light
An open softbox lights up the whole room. Use a grid, flags, barn doors — or place the flash tighter.
Wrong material
Shiny polyester shows hotspots. Choose molton or good paper instead.
Ambient too bright while flashing
Without suppressing ambient, the wall stays visible. Get it black first, then flash.
Sky as a background
Available light with backlight and a bright sky behind the head — physically the opposite of black.
Lightroom overkill
Cranking the AI mask instead of fixing the setup. Hair edges give it away instantly.
Wide angle too close
Reveals stands, wrinkles, room corners. Use a longer focal length, a tighter crop.
09
Recommendations

Four Products: Matrix, Comparison, and Verdicts

Four clear roles — not four interchangeable "kind of black" pieces. Read the matrix and the table, then the verdict for your use case.

Purchase

Top Pick · Budget · Mobile · Stand

Molton for absorption. Paper for a budget studio. Foldable for on location. Stand as the base for roll and fabric.

Vergleich
Stage / Molton
Stage Molton Black 6×5 m (B1)
walimex pro
walimex pro Background Cardboard Black
walimex pro
walimex pro Foldable Backdrop Black/White
walimex pro
walimex pro Background System
Bild
Stage Molton Black 6×5 m (B1)
walimex pro Background Cardboard Black
walimex pro Foldable Backdrop Black/White
walimex pro Background System
EmpfehlungTop PickBudget StudioMobileSetup
SensorStage molton, approx. 300 g/m²Background cardboard / paperFold fabric / pop-upBackground stand system
ISO-BereichBlackBlackBlack + WhiteRolls & fabric
Autofokusapprox. 6 × 5 mRoll (studio standard)150 × 200 cmPortable / collapsible
DetailHigh — little bounce-backMedium — reflects a bitMediumCardboard or molton
Stärken
  • +Absorbs light better than paper and polyester
  • +Versatile: background, flag, blackout
  • +Large enough for a portrait and small groups
  • +Grommets for quick hanging on a system
  • +An affordable entry point for studio and home-office shoots
  • +Smooth surface — no visible fabric texture
  • +Good for business headshots and product-adjacent portraits
  • +Sets up fast with a stand system
  • +Very portable — sets up in seconds
  • +White side doubles as a fill / bright BG
  • +Frame built in — no separate fabric system needed
  • +Fits location and content shoots
  • +Makes a paper roll or molton actually usable
  • +Collapsible — for home studio and occasional location use
  • +Width usually enough for portrait and half-body
  • +An affordable entry into a fixed setup
Schwächen
  • Wrinkles show if lit too close and too brightly
  • Heavier and bulkier than a paper roll
  • May need stretching for a smooth look
  • Reflects more light than molton — needs more distance
  • Creases and gets dirty; the roll needs to be advanced
  • Less portable than a foldable backdrop
  • Smaller than a large molton — limited framing
  • The frame/edge can show up in wide shots
  • Absorbs less than molton — needs more distance
  • Not a background on its own — buy material separately
  • Check stability with very wide fabric
  • Unnecessary if you only use a foldable backdrop
Geeignet fürStudios, home studios, and anyone who wants deep black without post-processing drama.A fixed studio or recurring home setups with a background stand.Location work, mobile business portraits, and tight rooms without a stand system.A home studio and anyone wanting to mount a paper roll or molton permanently.
Wo kaufen
ProductRoleAbsorptionMobile?Price Approx.Ideal For…
Stage Molton 6×5Top PickHighMedium$89Deep black / studio
walimex Cardboard BlackBudget StudioMediumNo$35Headshots / smooth surface
walimex Foldable B/WMobileMediumYes$55Location / tight rooms
walimex SystemSetupFoldable$55Mounting rolls & fabric

As of July 2026 — check exact prices and dimensions at the store

Top Pick: Stage Molton 6×5 m

My first choice when the background really needs to drop out. Absorbs stray light better than paper, and doubles as a flag. You stretch out the wrinkles — the gain in black is worth it.

Top Pick
Stage Molton Black 6×5 m (B1)
Bewertung
4.7
/ 5,0
★★★★
Basierend auf 0 verifizierten Bewertungen
Stage / Molton

Stage Molton Black 6×5 m (B1)

Top Pick — maximum light absorption

A heavy B1-rated stage molton absorbs stray light noticeably better than paper or cheap polyester. At 6×5 m it covers a portrait, half-body, and small groups — with grommets for hanging. My first choice whenever the background really needs to go deep black — it also doubles as a flag and a window blackout.

Was überzeugt
  • +Absorbs light better than paper and polyester
  • +Versatile: background, flag, blackout
  • +Large enough for a portrait and small groups
  • +Grommets for quick hanging on a system
Was Du wissen solltest
  • Wrinkles show if lit too close and too brightly
  • Heavier and bulkier than a paper roll
  • May need stretching for a smooth look
Editor's Statement

Best absorption — the fabric studios take seriously

Verfügbar bei

Budget Studio: walimex Background Cardboard

A clean paper surface for repeat headshots. An affordable entry point — with a stand and distance. Less forgiving of stray light than molton.

Budget Studio
walimex pro Background Cardboard Black
Bewertung
4.5
/ 5,0
★★★★
Basierend auf 0 verifizierten Bewertungen
walimex pro

walimex pro Background Cardboard Black

Budget Studio — a paper roll for clean portraits

A classic black paper roll for studio and home setups. A smooth surface with no fabric texture, great for headshots and business portraits. Typically around $35. Needs a stand system or wall mount — and distance from the subject, or the paper turns gray instead of black.

Was überzeugt
  • +An affordable entry point for studio and home-office shoots
  • +Smooth surface — no visible fabric texture
  • +Good for business headshots and product-adjacent portraits
  • +Sets up fast with a stand system
Was Du wissen solltest
  • Reflects more light than molton — needs more distance
  • Creases and gets dirty; the roll needs to be advanced
  • Less portable than a foldable backdrop
Editor's Statement

Start cheap — distance and light shaping decide the rest

Verfügbar bei

Mobile: walimex Foldable Backdrop Black/White

For on-site business work and small apartments. Fast setup, a white side as a bonus. No substitute for a large molton in a fixed studio — but the right compromise on location.

Mobile
walimex pro Foldable Backdrop Black/White
Bewertung
4.4
/ 5,0
★★★★
Basierend auf 0 verifizierten Bewertungen
walimex pro

walimex pro Foldable Backdrop Black/White

Mobile — 2-in-1 for location and small rooms

A self-erecting foldable backdrop, 150×200 cm, with a black side and a white side. Sets up fast, comes with a bag — ideal for on-site business work, content days, and small apartments. The black side isn't molton-level, but with distance and tight light shaping it holds up for clean looks.

Was überzeugt
  • +Very portable — sets up in seconds
  • +White side doubles as a fill / bright BG
  • +Frame built in — no separate fabric system needed
  • +Fits location and content shoots
Was Du wissen solltest
  • Smaller than a large molton — limited framing
  • The frame/edge can show up in wide shots
  • Absorbs less than molton — needs more distance
Editor's Statement

For on the go — black and white in one piece

Verfügbar bei

Setup: walimex Background System

The base under roll and fabric. Not a background on its own — paired with molton or cardboard, it's a complete home-studio rig.

Setup
walimex pro Background System
Bewertung
4.3
/ 5,0
★★★★
Basierend auf 0 verifizierten Bewertungen
walimex pro

walimex pro Background System

Setup — a stand for paper rolls and fabric

A background stand system for paper rolls and fabric. Typically around $55. Without solid support, even a great roll is useless. A sensible base for a home studio and recurring setups — paired with cardboard or molton, it becomes a complete studio kit.

Was überzeugt
  • +Makes a paper roll or molton actually usable
  • +Collapsible — for home studio and occasional location use
  • +Width usually enough for portrait and half-body
  • +An affordable entry into a fixed setup
Was Du wissen solltest
  • Not a background on its own — buy material separately
  • Check stability with very wide fabric
  • Unnecessary if you only use a foldable backdrop
Editor's Statement

The base under paper and molton

Verfügbar bei
10
Verdict

Black Is Distance, Material, and Light — Not Just a Slider

A black background for photos happens when the subject gets light and the background gets as little as possible. The inverse square law gives you the numbers: doubled distance ≈ a quarter of the light ≈ −2 stops. Molton absorbs better than paper, paper better than shiny polyester. Available light and flash-to-black extend this to locations and rooms without a stand.

Default for the home studio: stage molton (+ stand). Budget: paper roll. Mobile: foldable backdrop. Outdoor: look for shadow behind the subject first. Lightroom deepens the black — but it doesn't replace a setup, and it shouldn't chop up hair.

11
FAQ

Common Questions About Black Backgrounds

Why does my black background turn gray?
Usually too little distance and too much stray light. Pull the subject and the light away from the background, and shape the light tighter (grid/flag). Check your material: shiny fabric reflects more than molton.
Which material is best for deep black?
Stage molton or velvet absorbs best. A paper roll is the strong budget-studio compromise. Cheap polyester is often too reflective.
How far should the model stand from the background?
As far as the room allows — often 1.5–3 m works well. Double the distance from light/subject to the BG, and the amount of light on the background drops to roughly a quarter (−2 stops).
Can I get a black background without a studio?
Yes. Outdoors: bright subject, background in shadow, expose for the face. Or with flash: kill the ambient, flash only the subject. Alternatively, use a mobile foldable backdrop.
What does "flash to black" mean?
You set the camera dark enough that nothing shows without flash, then expose only the subject with flash. Whatever the flash doesn't reach — typically the far wall — stays black.
Should I mask the background with AI in Lightroom?
Yes, sparingly — after global blacks/contrast already help. Pushing the mask too hard usually destroys hair edges. Better to get more distance on set and rely less on mask drama.
Paper roll or molton — what should I buy?
Molton for maximum absorption and flexibility (it also works as a flag). Paper for a smooth surface and budget headshots in a fixed setup. Both ideally need a stand system.
Do I really need a background system?
For rolls and large fabrics: yes, practically essential. For pop-up foldable backdrops: no. For available light and flash-to-black against a dark wall: also no.
What focal length works well for portraits against black?
From around 85mm you work comfortably: less room chaos in the frame, a calmer background. A wide angle close to the subject often shows stands and wrinkles.
Does this technique work for products too?
Yes — often with a paper roll for a smooth surface, tight light, and enough distance. Glossy products reflect the room; flags and directed light are essential.
35mm & 120mm film presets — Lightroom presets by Martin Kleinheinz

From my workflow

35mm & 120mm film presets

Portra, Kodak Gold, Velvia, HP5 & more — ready-made XMP presets for Lightroom Classic and mobile.

35mm & 120mm Film Lightroom Presets · €29

Go to preset pack
Affiliate links marked with * — Amazon product links use partner ID martinkleinheinz-21. I earn a small commission if you buy through these links; there's no extra cost to you. The recommendations are based on hands-on practice and material properties — no brand sponsored this article.
Newsletter

Stay in the loop.

Camera and photography news, honest gear tests and new articles — in your inbox. Infrequent but relevant. No spam, unsubscribe anytime.

Keep reading

From the journal.

Fotograf, Martin Fernando Mera Kleinheinz · Franz-Bork-Straße 21, 30163 Hannover · 0179 4085297