Photographing Portraits: The Complete Guide for Beginners 2026
What you need, how to plan a portrait shoot and how preparation, location and workflow become a rounded experience — step by step for hobby photographers.
Author
Martin Kleinheinz
Photographer · Hannover
Updated
July 3, 2026
You want to photograph portraits — not just quickly snap someone, but a small shoot with a beginning, middle and end. Maybe with your partner, a child, a friend or someone who asked: "Can you take a nice photo of me?" And you wonder: what do I actually need? Where do I do it? How does an afternoon like that run?
This guide answers exactly that. It's your overview — from idea to finished image. Technical details on light, aperture and focus are collected in Portrait Photography Tips with cheat sheet. Here it's about planning, gear, workflow and the big picture — so "let's take a few photos" becomes a shoot everyone looks forward to.
00
Entry
Photographing portraits — more than a click
A portrait shoot is a small production. Not Hollywood — but more than a street snapshot. You decide beforehand: where? when? what mood? what does your subject wear? how much time do you have? These decisions make the difference between ten mediocre images and five that really stick.
As a hobby photographer you don't need to rent a studio or organise a team. A well-planned home shoot with window light often beats a chaotic outdoor adventure without a concept. Conversely, one walk in golden hour with a clear idea can bring more than three hours without a plan.
This guide
Portrait Photography Tips
What do I need? Planning, workflow, location
How do I set light, aperture & focus?
Shoot from start to finish
Technique cheat sheet on the go
Example shoots with images
Pose, bokeh, typical mistakes
Two articles, one topic — they complement, don't duplicate
01
Types
Which type of portrait do you want to shoot?
Before you pack equipment, clarify: what kind of portrait should it be? The answer determines location, lens, duration and how much you need to prepare.
Headshot / close portrait
Face and shoulders in focus — for LinkedIn, applications, dating or simply a nice keepsake. Little distraction, calm background, 10–30 minutes often enough. More in the Profile Picture Guide.
Headshot: face centre stage, little environment — ideal for profile pictures
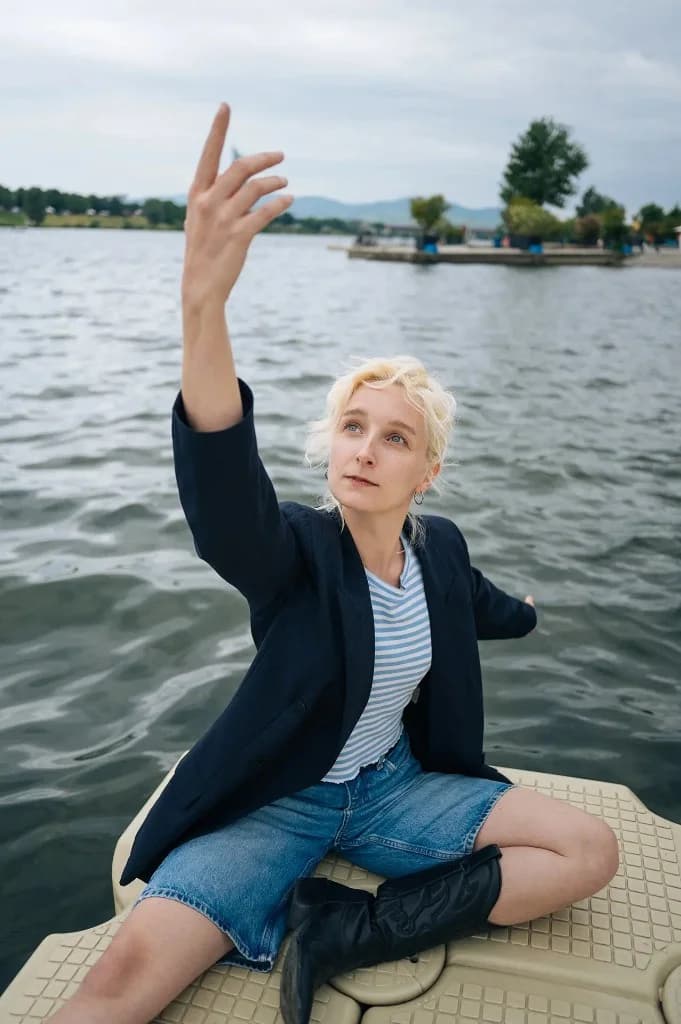
Lifestyle portrait
The person in an everyday situation — on the sofa, in a café, on a walk. It's about mood and personality, not just the face. Needs a bit more time (45–90 minutes) and a fitting location.
Lifestyle: person and environment tell a story together
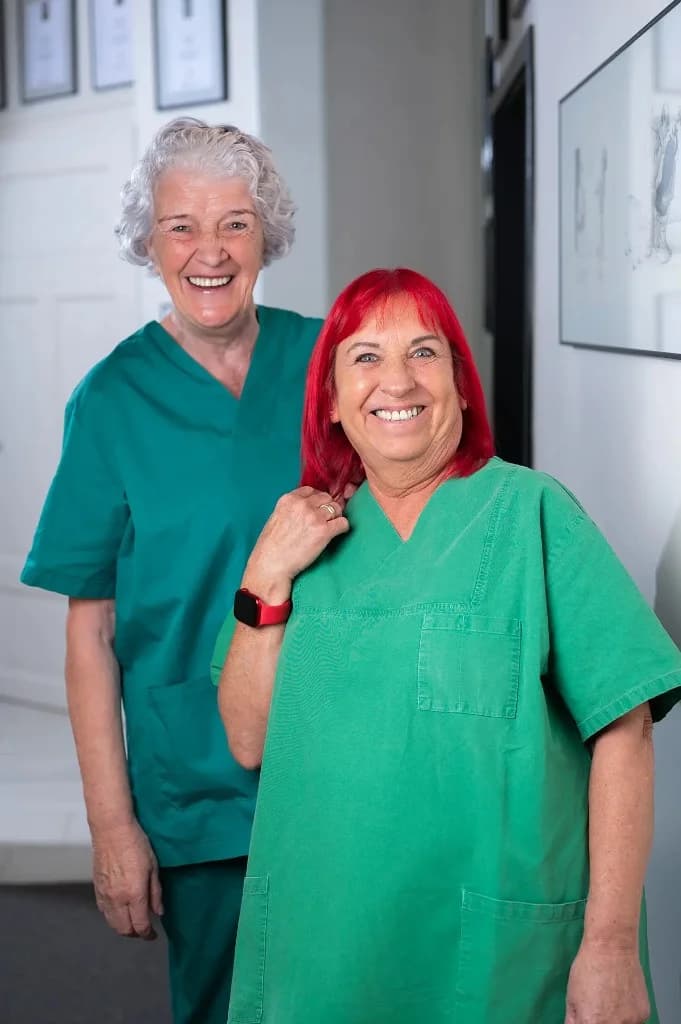
Environmental portrait
Half-length or full body in an environment that fits the person — workshop, office, favourite park. The space is part of the story. Good for about pages, artists, self-employed people.
Environmental: the setting shows who the person is or what they do
Creative / editorial
More staged — shadows, colours, unusual perspectives. For portfolio, Instagram or when you want to experiment. Needs an idea and often more preparation (outfit, props, light plan). Inspiration: Photoshoot Ideas.
Editorial: deliberate staging — light, pose and colour work together
02
Equipment
What you really need — and what can wait
The biggest trap when photographing portraits: thinking too long about equipment, too little about planning. Here are two levels — minimal is enough for your first real shoot.
Category
Minimal (enough)
Comfort (nice to have)
Camera
Smartphone or mirrorless with manual/A mode
APS-C or full frame with good AF
Lens
Kit zoom or 50mm f/1.8
35mm + 85mm primes
Light
Large window, overcast day outdoors
Reflector (white), optional flash with diffuser
Tripod
Not needed to start
Helpful in low light or groups
Memory card
Empty, formatted, room for 100+ RAW
Second card as backup
Battery
Fully charged + spare if available
USB charger for long sessions
Other
Microfiber cloth for lens
Clipboard with shot list, water for subject
Equipment overview for portrait shoots — minimal vs. comfort
To start, camera + one window is enough — no studio needed
Lens — briefly explained
Which glass you bring depends on portrait type. Headshot: 50–85 mm. Lifestyle indoors: 35–50 mm. Outdoors with wide environment: kit zoom. Details and buying advice: Which Lens for What and Which Focal Length for What.
Mini set at home — without a studio
A portrait set at home consists of: clear wall or tidy corner, large window, optional white bedsheet as background, chair or stool for your subject. No pro gear — just a calm spot with good light.
Your first set can be this simple: window, wall, some distance
03
Planning
Planning — so the afternoon doesn't end in chaos
A good portrait shoot starts a day (or a week) before — not when your subject is at the door. You don't need a 20-page brief. But you should make five decisions:
1. Date & time
Indoors: anytime in daylight. Outdoors: golden hour (1–2 h after sunrise or before sunset) or overcast day.
2. Duration
First shoot: plan 45–60 minutes — including setup and break. Short and relaxed beats three hours of exhaustion.
3. Location
Home, park, urban wall, favourite café — more in the next section.
4. Outfit
Bring 2–3 options. Solid colours, no strong patterns, fitting the location. Dark clothes before light wall, light before dark background.
5. Mood / reference
Show 2–3 example images (Pinterest, Instagram) — "roughly like this." Prevents misunderstandings.
Write a mini shot list — not a novel, five to eight points are enough: "window light profile", "smile looking at camera", "half-length on chair", "detail hands", "to finish relaxed on sofa". That way you forget nothing and your subject feels you're prepared.
04
Location
Location & set — where your portrait lives
The location is stage and mood at once. When photographing portraits as a hobby you have four reliable categories:
Location
Advantages
Watch out for
Portrait type
Home (window)
Controllable, free, warm
Tidy up, remove distractions from frame
Headshot, lifestyle
Park / nature
Beautiful background, natural
Crowds, windy weather
Lifestyle, environmental
City / architecture
Graphic, modern
Passers-by, permits if commercial
Editorial, street portrait
Office / workshop
Authentic to person
Tight spaces, mixed light
Environmental, business
Location overview for hobby portrait shoots
Location scouting — 15 minutes that pay off
Go once beforehand — without subject, without pressure. Look: where does light fall? what's in the background? where can we sit? Take two test shots of the wall or alley. That saves frustration and time on shoot day.
Outdoor: scout location beforehand — check light and background
Building a small set — even without a studio
A set is everything visible in the frame. Remove distractions. Turn furniture so window light comes from the side. Hang neutral fabric if the wallpaper is too busy. Place a chair away from the wall — depth and softer background appear.
Pro setups follow the same logic: calm background, directional light, distance
05
People
Your subject — agreements that relax
Your subject is a partner, not a prop. Whether partner, child or friend — clear, friendly agreements make the shoot pleasant. That shows directly in the images.
◆Explain beforehand: "We'll do about an hour, I'll show you images in between, you can always ask for a break."
◆Clarify rights: Private often needs only verbal okay. For social media, website or print: written consent — template: Model Release.
◆No makeup pressure: Natural is fine. If makeup: subtle, no shine for flash.
◆Children: Short sessions (20–30 min), include play, parents nearby.
◆After the shoot: Say when images roughly arrive (e.g. "in a week") — and keep it.
Show your subject in between 1–2 images on the display — not all, but enough for trust to grow. "The light on you looks really good right now" motivates more than silent clicking.
06
Workflow
The shoot workflow — from arrival to wrap-up
This is how a typical hobby portrait shoot (60 minutes) runs. You can shorten or extend — the order stays sensible.
Phase
Duration
What happens
Arrival & setup
10 min
Check location, set camera, subject picks outfit, brief explain
Warm-up
10 min
Loose first images, subject settles in, you check light & settings
Main phase
30 min
Work shot list — different gaze directions, distances, crops
Experiment
10 min
One creative idea — shadow, movement, different perspective
Wrap-up
5 min
Final favourites, thanks, delivery date agreed
Standard workflow for a 60-minute portrait shoot
Warm-up — don't skip
The first 10 shots are often for both sides to arrive. Don't delete, don't despair. Talk while shooting, let your subject move, find the best light position. Only when face and light work, start the "real" subjects.
Main phase — systematic, not hectic
Work your shot list — but flexibly. If a subject doesn't work, move on. If something unexpected looks good, more of it. Vary: close / half-length / with environment, look at camera / to the side, serious / smiling. That gives you selection at the end.
07
Example
Example shoot: Portrait at home by the window
Scenario: You photograph your partner or a friend — a nice portrait for home or Instagram. Duration: 45 minutes. Equipment: mirrorless, 50mm f/1.8, window with curtain.
Preparation (day before)
Tidy living room corner. Shot list: profile, frontal, half-length on chair, hands in lap. Outfit: solid shirt, dark jeans.
Setup (10 min)
Chair 1.5 m from window, face sideways to light. Camera: A mode, f/2, ISO 400, eye AF.
Warm-up (10 min)
10 loose shots, chat, show display — "that's how the light looks right now."
Main subject (20 min)
Profile to window side, then frontal, look at and beside camera. Turn chair slightly for variation.
Finish (5 min)
Pick favourite together. Promise: 5 edited images in a week.
Typical result: sidelight from window, calm background, eyes in focus
08
Example
Example shoot: Outdoor portrait in golden hour
Scenario: Portrait in the park — friend or family member, natural mood. Duration: 60 minutes. Equipment: camera, 85 mm or 56 mm (APS-C), optional reflector.
Scouting (before)
Found tree-lined alley — diffuse light, calm background. Plan B: covered pavilion.
Timing
90 minutes before sunset. Sun sideways, not in eyes.
Setup
Subject 3 m in front of tree line. f/2.8, 1/250 s, ISO 200. Reflector from below optional.
Subject variations
Walk and stop, sit on bench, look over shoulder, half-length with hands in pockets.
Finish
Backlight silhouette as last subject — when sun is low.
Outdoor: soft evening light, distance to background for bokeh
Optional finish: silhouette with low sun
09
Post-processing
After the shoot — selection, editing, delivery
A shoot doesn't end with the last shutter press. Three steps turn raw files into a portrait your subject likes to show.
1. Selection (culling)
Import all images into Lightroom or similar. First pass: soft eyes, odd faces, double blinks — gone. Second pass: from 80 to 15–20. Third pass: best 5–10 to edit. Your subject doesn't need to see 200 images — only your selection.
2. Editing
For portraits: keep skin tones natural. Brightness, light contrast, fine-tune white balance. No extreme smoothing — that looks artificial fast. Basics: Photo Editing for Beginners.
3. Delivery
Export as high-resolution JPEG (long side 3000–4000 px for print, 2000 px enough for social). Name files clearly (`FirstName_Portrait_01.jpg`). Deliver via link, USB stick or messaging — as agreed. If your subject will post: clarify usage rights beforehand.
10
Checklist
Full checklist: from first idea to finished portrait
This overview sums up the whole guide — to check off before your first (or next) portrait shoot. Technical details: Portrait Photography Tips.
Phase
Task
Done?
Idea
Choose portrait type (headshot, lifestyle, environmental, editorial)
☐
Planning
Date, time, duration (45–60 min), plan B for weather
☐
Location
Scout spot or prepare home set (window, background)
☐
Equipment
Camera, lens, battery, card, cloth — packing list packed
☐
Subject
Outfit discussed, rights clarified, expectations communicated
Photographing portraits — full checklist from idea to delivery
“A good shoot feels like a good afternoon for everyone involved — the images are usually good too.”
— Martin Kleinheinz
11
FAQ
Frequently asked questions about photographing portraits
How long should my first portrait shoot last?+
45–60 minutes is ideal — including warm-up and break. Shorter feels rushed, longer tires beginner subjects quickly.
Do I need a studio?+
No. A window at home or a park in good light are enough for your first professionally looking portrait shoot.
What's the difference from "Portrait Photography Tips"?+
This guide describes planning, equipment and workflow of a shoot. Portrait Photography Tips delivers technique, light and a technique cheat sheet.
Can I post portraits of friends online?+
Private often with verbal okay. For Instagram, website or advertising: written consent — Model Release.
How do I find a subject as a beginner?+
Start with people you know. Later: TFP (time for print) with hobby models via Instagram or model communities — always clarify expectations beforehand.
Which camera suits portrait shoots?+
Any mirrorless or good smartphone in portrait mode. More important than the body: fast prime and good light. More: Camera for Beginners.
Transparency notice: This article contains affiliate links. If you buy through them I earn a small commission at no extra cost to you. Editorial content is unaffected.
◆ Newsletter
Stay in the loop.
Camera and photography news, honest gear tests and new articles — in your inbox. Infrequent but relevant. No spam, unsubscribe anytime.